Showing posts with label quilty musings. Show all posts

Wednesday, 26 November 2014

From A - Best Laid Plans

I picked up some Christmas fabric for my birthday last year with the intention of turning it into two Christmas quilts. Predictably, neither quilt was finished by the time Christmas rolled around and I set them aside, patted myself on the back for my "head start" on next year and moved on to the next big thing.

Christmas Fabrics

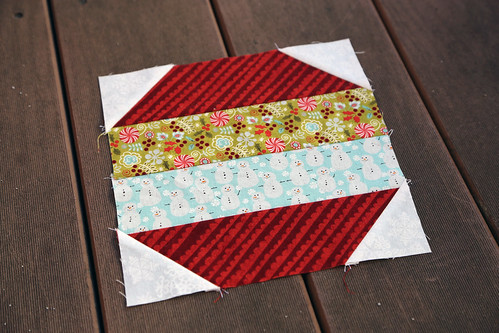
Figuring that I had already started making blocks, I didn't bother digging out the Christmas quilts until mid-October. When I finally did, I was surprised to find that I had actually only made one of the 48 blocks I needed to finish both quilts.

IMG_4804

Never one to be deterred by great obstacles, I set about making blocks for the quilt I wanted to keep so that I could finish it early and have some time to enjoy it in the time leading up to the Christmas season. There would still be loads of time to make a second quilt for my mom after I was snuggled under a quilt of my own.

IMG_4801

Two weeks and two blocks on (bringing the score to 3 of 48 for those keeping track), my computational error became evident and I reconsidered my approach, opting to abandon my quilt completely and put all of my sewing time into the quilt for my mom.

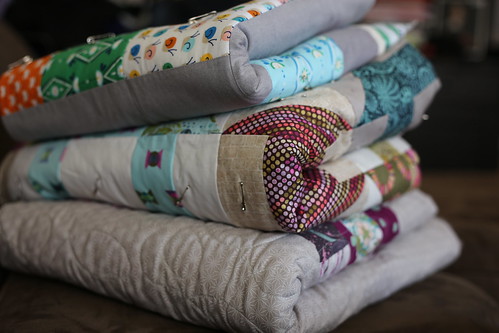
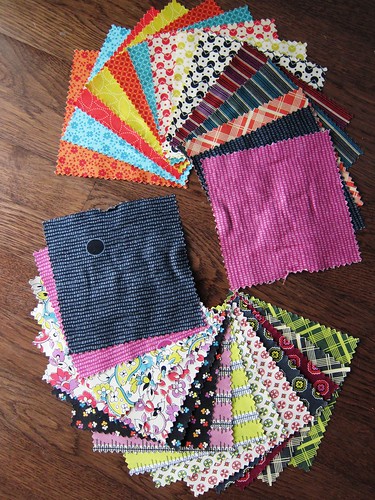
Fast forward another couple of weeks and I can honestly say that my house is just two fistfuls of tinsel away from looking like the aftermath of a particularly festive Christmas morning except with piles of fabric occupying the places traditionally reserved for piles of discarded wrapping paper.

IMG_4788

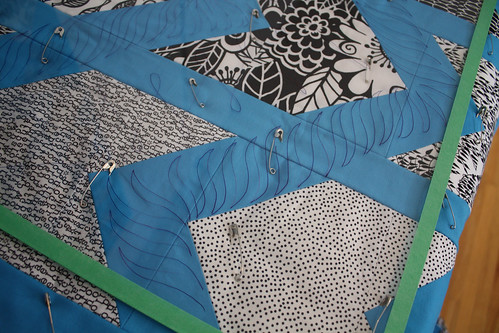
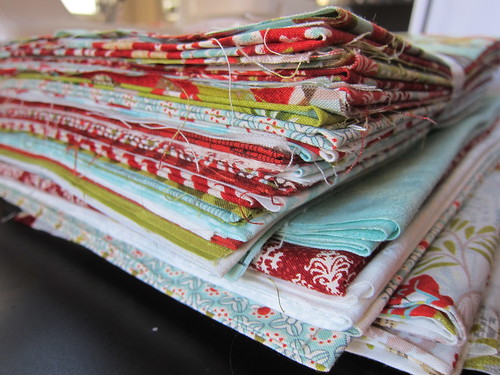
Christmas fabric and half finished blocks cover every surface of our living space and a "don't lean back" rule was implemented for the couch and all four dining room chairs sometime last week to protect the finished bits draped over the chair backs.

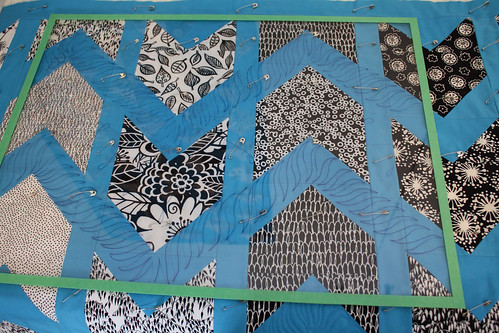
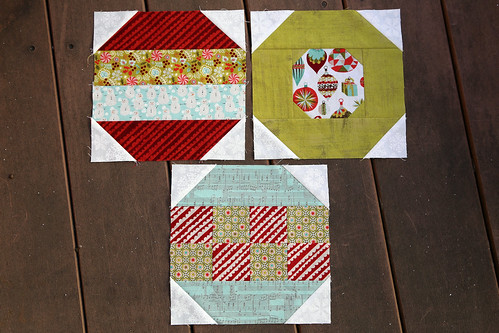
Despite these efforts, I am still 9 blocks away from finishing the first quilt. Sounds manageable until you realize that once those are done they will need to be assembled into a quilt top. Borders will have to be added. A quilt back will have to be made and I'll have to bribe someone with a long-arm to quilt the darn thing before I head home for the holidays. There is a high probability that the "finished" quilt will be gifted without a binding attached.

IMG_4795

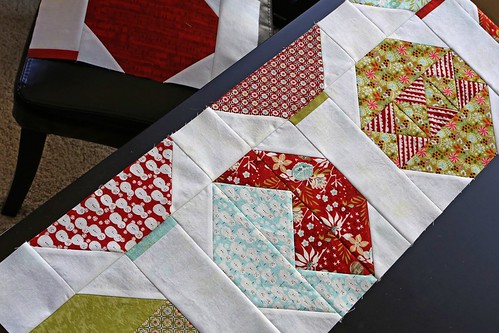
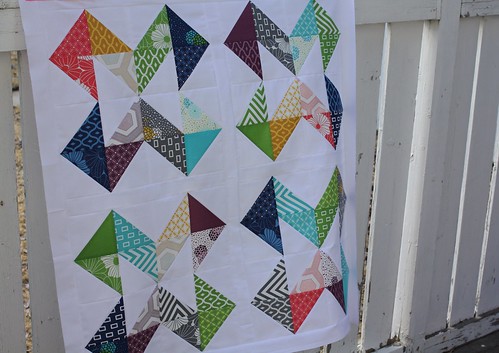
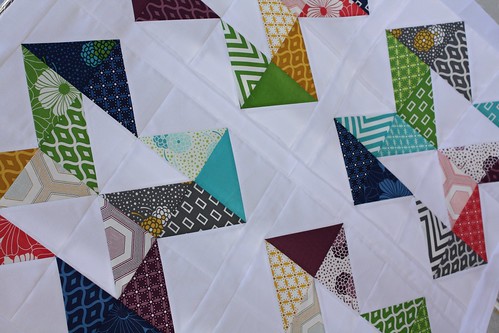
I did manage to finish the first two rows of blocks last weekend. It's a small victory but enough to convince me that with some luck and a whole lot of caffeine, I might just get it (mostly) done in time.

How are you holiday craft plans coming? Linking up to WIP Wednesday over at Freshly Pieced. 

Wednesday, 15 October 2014

From A - WIP Wednesday

I have amassed a huge stack of WIPs over the years. For every type of craft I have ever tried, there are at least a couple of unfinished projects waiting in the wings. I'm not really sure why this has become such a recurring pattern since I love the feeling of finishing a project, sending it off to its new home and watching people enjoy it for years to come.

Most of my quilts end up getting stalled after they are basted and ready to quilt. Currently, I have at least 6 quilts that are just waiting to be quilted and bound. I can't quite explain it but there is definitely something about the process of choosing a quilting design and forcing the quilt sandwich through my machine that makes me cast a project aside faster than you can say "new fabric."

Stack of Quilty WIPs

Three of these almost finished quilts are taking up some prime real estate on our living room couch. I'm going to try and tackle them this weekend since two are baby quilts that should really get mailed off before the intended recipients start walking.

That said, there is a good chance I'll get distracted by this little number somewhere along the way. That is the Spring Quakers pattern by Rosewood Manor that I started just about a year ago.

Spring Quakers Cross Stitch

Most of my slow and steady progress on this project happens when I am supposed to working on something else. Those beautiful hand-dyed Valdani flosses with their perfectly saturated colours are irresistible when facing something I "should" be doing.

Spring Quakers Valdani Floss

Do you have some long-forgotten WIP skeletons in your closet? At what stage do you usually get bogged down? Any tricks for "breaking the cycle?" Please do tell!

Linking up to WIP Wednesday over at Freshly Pieced.

Monday, 26 May 2014

From K - Quilt Design Dabblings

Decisions, decisions... I'm required to make a hundred decisions everyday at work (literally)... so when I need to make them in real life for quilts, I'm often all 'decision-ed out'.
Right now I'm debating a few quilt layouts for my Constellations Camping Quilt, and honestly I'm really struggling. Any input it wholeheartedly welcomed!

Option A:

Option B:

Option C:

I really love seeing quilty friends' dabble in their design process, so I thought I would share these ideas with you. I'm torn between which design to choose, but figure I can't really go wrong, can I?

Friday, 18 April 2014

From K - Directions Baby Quilt Top

When life gets crazy, I often find that the best solution to slow it down is to sit down at my Janome and sew. I'm not talking 'mandatory sewing to narrowly meet a looming deadline' sewing either. I'm talking about the type of sewing that is defined by not being defined at all. No plans, no limits, no rules - that is the type of sewing that stops time and stress and just gets me energized again.

A couple weeks ago I cleared my sewing space, removed all my WiPs from sight, and just sat down to sew. No real goal in mind, no real plan, just a charm pack of Simply Style and some Kona yardage.


I started by making half square triangles and ended when I had a quilt layout on my design wall that seemed fitting. Toss in some sashing and a border, and before I knew it, I had a baby quilt!

Amanda pointed out that the negetive space in this quilt resembles a north arrow from a map. It felt a bit ironic but still fitting to call this quilt 'Directions' as this quilt started with no direction, but then ended with one.

You win some, you lose some, and sometimes you just learn something. I definitely learned something in this quilt. I'm definitely seeing more of this laissez faire quilting style in my future.

Wednesday, 29 May 2013

From K - Get Together

I started 2013 with a lot of motivation to finish up some quilt WiPs, and also intended to start quite a few new ones. What I didn't anticipate at that time though was how real life would throw me a loop. It's been a tough couple of months but I'm really starting to get back on track, and I hope that means I'll be able to start sharing more quality time with my Janome.

Last week my hubs helped me out by throwing me in head first, and picked out a selection of prints from Get Together by David Walker, with a request for a camping quilt. Large, cozy, and care free is the plan. A quilt for us, a quilt made for a utilitarian purpose, and one we can love without hesitation of getting it caught in a rainstorm, danced on at festivals, or the fear of spills during picnics.


Since the critters are what my husband and I love, I want to keep it classic and simple. I'm planning a double-sided quilt so it doesn't feel like there's a top or a backing. So far I have two columns sewn, and two more to go.


This is the perfect project to get me back at it. Of all the quilts I've made, not one has lived under our roof, and I'm so thrilled with the prospect of having a huge comfy quilt of our own.

Sunday, 17 March 2013

From K - Acrylic Design Board Tutorial

One of my most commonly used quilting tools can be created by using less than $20 of supplies from your local hardware store and about 5 minutes of your time. Without fail, this tool gets used on every one of my quilt projects so I thought it was high time I showed it to you.

I'm not sure if there is an official name for this somewhere, but I call it an Acrylic Design Board. The ingredients are simple, all you need is a sheet of acrylic from your local hardware store, some painters tape and some non-permanent white board markers. Home Depot sells the acrylic sheets in various precut sizes, the that one I show here is 18"x24" (which I picked up for $12). Here's a quick link.

When I first began quilting I was a bit intimidated by FMQ, and by intimidated I really mean terrified. After completing a couple of quilts though I realized that part of what inspired me to quilt in the first place was all of the beautiful FMQ out in the bloggisphere, and it was high time for me to give it a go.
The best way for me to decide on a FMQ design on any quilt it to test it out first, so I use markers on my acrylic design board to visualize what effect various stitching will give to my quilt top.

Once I settle on a design, I wipe the board clean and sketch it out a few more times until I feel confident in the motion. I don't transfer the markings, I just remove the sheet and start quilting. Be careful when moving the board around though as not to smudge any marker on your quilt - it can create a terrible stain.
On more complicated designs I will often prop the board up close to my machine, which lets me easily compare design size and shape.

While I'm a novice quilter and still have a LOT to learn, I find that this tool makes new techniques and designs more approachable and a lot less scary. This tool has really helped me to push from my comfort zone and try new things. Hopefully you can find some benefit from it too.

Friday, 7 December 2012

From K - Feeling inspired

On Monday I posted photos of my new birdie sling bag featuring a print from Anna Maria Horner's newest line Field Study. When I first spotted the Sundial print in person I was immediately inspired and knew I needed to quilt it up.


As soon as I brought this fabric home I set to cutting out my pattern pieces for the bag, and then immediately starting shopping my stash for coordinates.

Lucky for me I had a number of great near solids in my stash because of the Stash Stack Club from Pink Castle Fabric to get me started. I followed that up with a couple stops by my favorite local quilting shops and now I'm ready to slice these beauties up.


Fabrics from left to right (silver to purple) include:

Silver by Maywood Study; Kona Solid in Peacock; Nordic Diamonds from Heaven and Helsinki by Patty Young; Diagonal Stripe in Aqua Sea by Curiosities; Dots in Magenta from Nurse Central; Purple Tufts from Outfoxed by Lizzy House; Purple from Hello Pilgrim by Lizzy House; Ladder Dot from Chicopee by Denyse Schmidt.

Fabrics from left to right (citron to confetti print) include:

Four Square from Hope Valley by Denyse Schmidt; Crosshatch Sketch in Citron by Timeless Treasures; Dot n' Square in Citron by Michael Miller; Honeycomb from Modern Meadow by Joel Dewberry; Gelato 11766 by Daiwabo; Pick a Bunch by Nancy Mims; Azalea Kona Solid; Guinea Hen from Farmington by Martha Negley; Fiesta by Jennifer Sampou.


I'm so excited to get started! What fabrics have you been inspired by lately?

Friday, 19 October 2012

From A - New and Shiny

Over the summer, I found this quilt on Pinterest while randomly browsing around. It became one of those projects that takes over your brain. I found myself thinking about it over and over and over. I kept sketching the quilt while watching TV.

Starry Nine Patch

I spent hours scrolling through pages and pages of fabric swatches on my favourite on line quilt shops, searching for inspiration. Although, I was really liking Denyse Schmidt's Chicopee line I had dismissed it as a fabric contender early on. I didn't think that the bold colours would work for the nine-patch sections and that the overall look of the quilt would be too "grown up". After ruminating on it for months, I finally decided that I would shelve the idea and wait for inspiration hit. Finally I found it while checking Craftsy's deals page one morning: Chicopee charm packs!

Starry Nine Patch

I love that these charms are 6" wide. I was originally planning to use 5" blocks. This was part of the problem since the finished quilt would only end up being about 41" square, which felt more like a baby sized quilt to me.  The larger blocks mean that the finished quilt will end up at 50" x 50", a perfect lap quilt! Best part is that at 30 charms per pack, two charm packs and a fat quarter will make the whole quilt. That's only about $20.00 worth of fabric.

Starry Nine Patch

Since receiving those charm packs, I can't seem to focus on any of my other projects. While I sit at my machine piecing Smitten blocks, I just keep wanting to break into my Chicopee charms. After fighting the urge for three weeks, I'm finally ready to give in.

Starry Nine Patch

This is crafting, this is my hobby, this is supposed to be fun. Forget what I "should" be working on, I'm going to stay true to myself and work on the project that is inspiring and exciting me right now. I'm declaring this Friday "guilt-free making day". Who's in?

Tuesday, 11 September 2012

From K - Quilt Top Planning (Using TouchDraw)

I recently bought an iPad and I cannot say enough about how much I love it. It has made blogging a cinch while on the run, it takes relatively high quality images when my DSLR isn't close at hand, and most of all, it makes for one of the best quilt top planning tools. I have tried designing quilt tops using blank paper, grid paper, excel, pencil, and markers, but nothing comes close to the TouchDraw app. I won't go into a huge explanation of how it works, but I thought it might be helpful for you to see how it can help organize a quilt layout, using my current wax print quilt as an example.


In July I posted about my quilt top layout for the first of two wax print quilts. I decided to go the route of using magic numbers (2.5", 4.5" and 6.5" square blocks), however I was worried that it wouldn't look random enough given the consistent sizes. In order to minimize the effect of having large stretches of blocks butted together, I went to touch drawer to lay out some "random-ish" type areas.
In the above image, you can see that each quilt area is divided by colours, and then further divided by numbers within each colour group. I specifically numbered them so that I would remember which order to sew the blocks once they were all prepared.

Using that TouchDraw illustration as a template, I began laying out my previously prepared 2.5", 4.5" and 6.5" squares according to the grouping requirements. Even though I have yet to complete the entire quilt top layout, you can see that many of the numbered blocks from my TouchDraw illustration are quite easy to identify on my design wall already.


Once I had quite a few of my blocks complete, I thought I would sew a few blocks together to see how it came along. In this next image you can see that some of the numbered blocks on my drawing are now even easier to identify on the wall.


I've started using this tool on a couple of other future projects and I'm looking forward to seeing them come into fruition as well. I still have a lot to learn on this app, but so far I am pretty impressed with how easy it is to use, and how simple and quickly you can manipulate quilt top designs.

Monday, 20 August 2012

From K - The Quilt that Started an Obsession

One of the posts that I love reading most from other quilt bloggers is the story behind their first quilt. It's often this first quilt that leads to a lifetime of sore backs, nimble fingers and a whole lot of handmade goodness. I thought this might be as good of a time as ever to share my first quilt story.


Fresh of my honeymoon in the fall of 2009 I came home to the best news of all, I was going to become an Aunt! I don't actually know what first put the idea of making a quilt in my mind, but whatever it was, that first tiny iota of a thought led me immediately to the Internet. I found a local quilt shop that offered an intro to quilting course and before I knew it I was signed up and heading to class.


I didn't know a thing about modern quilting, what fabrics to pick, or how to read a pattern, so on the guidance of the instructor I bought all my fabric from the remnant fat quarter section (doh!).

Knowing that it needed to be gender neutral I went with a natural colour pallet. I had originally wanted to do yellows, greens and blues but the instructor talked me out of it (something about jaundice babies looking bad on those colours - except the quilt I made is lap sized and meant to last years so why I listened I don't know!).


To make my very first quilt top, I used a Bento Box pattern and considering it was my first time sewing in almost 10 years, I was thrilled with how it turned out . Using a rotary cutter and self healing mat made for a very quick prep job, and simple chain piecing helped bring this quilt together very quickly.


 Since I had purchased only fat quarters to make this top, I didn't have quite enough fabric to make a borderless quilt that would meet my desired finish size. To solve the size dilemna, I added both a narrow and wide border to frame in the quilt top.


Since this quilt top had a lot going on, I tried to bring some cohesion by choosing one of the bento box fabrics for my backing. When I added the wide border to the quilt top, I simply choose the exact same fabric from the backing, but in a different colour.


I straight line quilted this top using a 24x8.5 inch ruler, a water soluable pen, and the bento box shapes as a guide. After I machine sewed the binding on I heaved a huge sigh of relief when I held the final product. This quilt had a lot of heart sewn into it and I was just the first step in what I know will be a life long obsession.

Friday, 27 July 2012

From K - Desperately seeking a design wall

Tonight my hubby helped me take the first steps toward building my new design wall, and I couldn't be more pleased to get it started. One of the fundamental reasons why I was so desperate for my own craft space was to reduce the fabric explosion that currently invades my living room. Somehow a couple small fat quarters migrates into the room, followed by a  multitude more, and then it all decides to reside there for weeks on end. Having guests over means there is no longer a simple requirement to tidy up, but instead it creates the need to pack it all up or learn to entertain around it.

Now that I have my own dedicated craft room I thought this phenomenon would die out, but little did I know that even with a new space, fabric still continues to spread. Here is a photo of my new convertible sofa in our guest/craft room...


It looked like that for a couple of days before my wax print quilt required more space... so now it's begining to look more like this...


For a while now I've had a significant portion of my squares cut to create this next quilt top but no space that is large enough to maintain it all laid out together at once. I'm getting desperate for a design wall now to ensure the colors are balanced properly before I begin to sew it together. The picture below shows some of the green fabrics that I've cut so far (unfortunately this couch doesn't have room for all of the blues, purples, oranges and pinks).


Here's hoping we can polish this board off on the weekend so the rest of the colours can be laid out together.

Tuesday, 3 July 2012

From A - On Crinkles

As a relatively new quilter, I distinctly remember the terror I faced when contemplating the notion of throwing that first finished quilt in the washing machine.

While doing the tour of the online quilting community, I kept hearing about the crinking that happens when you wash a quilt. The consensus seemed to be that it was good but I loved the way my quilts looked pre-wash and wasn't sure that I'd agree.

To help other new quilters who aren't sure what to expect, I thought I'd give you a before and after comparison of my A First Lesson in Colour baby quilt.

The crinkling is caused when the batting shrinks during the first wash. I used Quilter's Dream Wool batting and it changed quite a bit after a pass through the machine.

With this particular quilt, the crinkling ended up softening the overall appearance of the bright high contrast colours and geometric construction.

It really changes the texture of the quilt but I'm starting to fall for the crinkly finish.