Saturday 31 August 2013

From K - Panda PJ Pants

Today I want to share a little secret with you... you see, I have a bad habit, and I hope I'm not alone in this (if I am, you have my permission to skip this post but I have a feeling you might be just as guilty too).

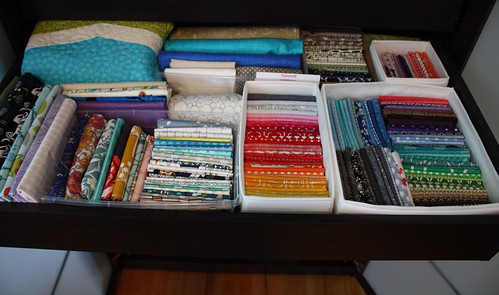
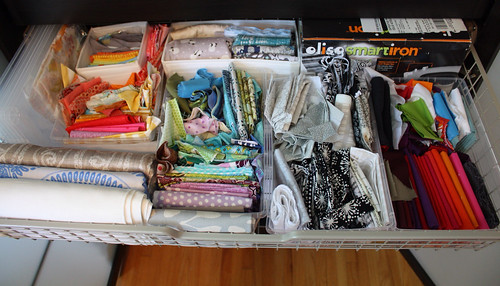
I don't know about you, but I often get really excited to start a new project - I rush out to buy the supplies, high tail it home, get started cut cut cutting away... but then when the going gets tough, I ever so calmly (or in this case not so calmly) 'supermarket sweep' the whole lot into the nearest drawer and call it a day. *insert brushing off hands here*


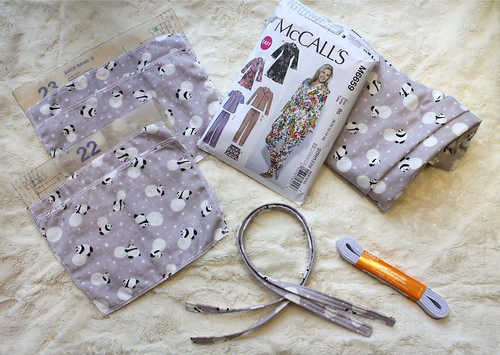
Earlier this month for my August: A Lovely Year of Finishes post, I mentioned a project that followed that description to a T. I bought the most lovely and adorable double gauze by Cosmo textile, complete with sunglass-wearing pandas pushing snow balls. I mean come on, this fabric was just begging to become PJ pants.


I have never worked with piping before so when I hit that little snag in my project I gave up. Well temporarily at least.


Ever begrudgingly thankful for public goal setting and self-imposed deadlines, I hauled this project out to the cabin with me this weekend to polish 'er off so to speak.


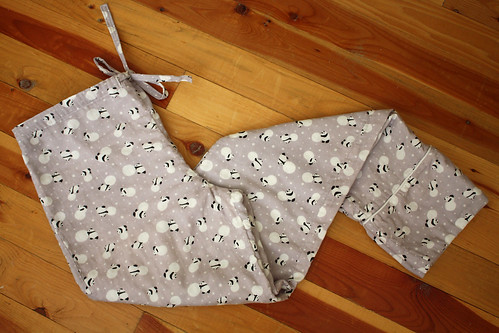
And I did just that, I piped these pants, altered the waistline by adding some elastic in the back, tailored, hemmed, and called it a day *pats self on the back*


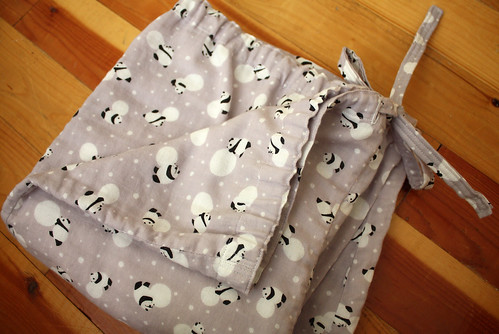
My piping is far from perfect, but I think next time it will be better. Part of the problem I had with the piping was that this pattern just wasn't meant for double gauze. While it's luxuriously soft, the bottom ankle panel, which includes an internal facing, is pretty dang thick (we're talking 4 layers!). Four layers, piping and a newbie piper just don't quite work wonderfully. On the plus side though my ankles will be nice and snugly warm this winter.

Have you struggled with a similar project in the past? Please tell me I'm not alone!

Friday 30 August 2013

From K - Finished Black & White Kites Quilt

Today, I'm excited to cross another WiP off of my seemingly ever growing to-sew list. Let me introduce my newest finish, Black and White Kites!

Black & White Kites Quilt

I whipped up this quilt top more than 7 months ago, and had it backed and basted right away. Why it sat unquilted for so long I honestly don't know since it's usually basting the holds up my projects (tell me I'm not the only one who dreads basting!). While I can't give you an explanation for the delay, I have to say that I'm happy I procrastinated.


Black & White Kites Quilt

I'm glad I waited to finish this quilt for for two reasons: (1) I really wasn't feeling inspired on how to quilt it and didn't want to rush the process; and (2) I needed a hand project for a recent road trip and this already basted quilt fit the bill perfectly.


Black & White Kites Quilt

If you follow us on Instagram (@everydayfray) you may have seen a couple of in-progress hand quilting pics of this project taken during our drive down to Seattle. Lucky for me, after I finished the quilting, I was able to borrow Amanda's machine in Seattle to stitch on the binding, ready for me to hand bind it on the road trip home.


Black & White Kites Quilt

Overall I was really happy with how this quilt came together, regardless of how long this finish took. I love the texture that the hand quilting adds to both the quilt top and backing. My first foray into hand quilting was on my Sew Positive Baby Quilt last month, so I was thrilled to try it out a second time so soon. Although I'm an obsessive finisher, this project reminds me that sometimes slowing down and taking your time can deliver a product that is worth the wait.


Black & White Kites Quilt

Final Quilt Details:
  • Quilt Name: Black & White Kites Quilt
  • Finished Size: baby quilt size (54" x 66")
  • Fabric: black and white fabric scraps (100% from this quilt), Kona Water (chevrons), Kimono Ty Pennington (quilt backing) and a mystery aqua print from Joann's (binding)
  • Pattern: one of many HST options (I didn't follow a pattern for this)
  • Quilting: hand quilted using white size 8 perle cotton
Black & White Kites Quilt

Additional posts about this quilt can be found herehere and here

This marks my second completed project for the Q3 2013 Finish A-Long - read more about my ambitious finishing goals here.

Linking up to TGIFF and Finish it upFriday.

Wednesday 28 August 2013

From K - I'm Swooning

Earlier this summer I decided that I couldn't hold out any longer - I needed to make a swoon quilt! I have drooled over Amanda's quilt top, wanting to make my own for far too long. I needed to see what all this swooning was about. I signed up for Swoon 2013, ordered some Tula Pink Salt Water FQs, and this past weekend I started piecing it together.

For my background fabric I chose a beautiful sand-like linen (which seemed fitting with the Salt Water fabric line). What I failed to comprehend though was how much bloody starch would be required... oh and shrinkage.

Let's just say I don't often prewash my quilt fabric and after cutting out ALL of my background pieces, they shrunk under my hot iron during the starching process.

Needless to say that dilemma was followed by tossing yardage in the wash, re-cutting and re-starching all my background pieces. I'm happy to say I'm back on track and I learned my lesson about mixing fabric types.

I love how all three blocks turned out, and I'm excited to see how the next six come together. This is a fun block to make because even though you plan out the fabrics, the final look is still a bit of a surprise.

It took me about 7 hours to make these three blocks (chain piecing the whole time). It felt like a lifetime, but when you realize just how BIG each block is, I'm surprised it didn't take longer. Here is a picture of my 65lb black lab beside my blocks to give you some perspective on scale.

I'm on a 'self imposed' tight deadline to finish this top in order to ship it out to a long arm quilter. I originally planned to make this quilt as a Christmas gift but now I'm wondering if thanksgiving is a better time (since I'll be home with family then). Canadian Thanksgiving is early October so I better get a move on!

Tuesday 27 August 2013

From A - On a Roll

When I started sewing, I wanted to make clothes. I loved the self-sufficiency that came from taking a length of fabric and turning it into something wearable. Over the last couple of years, I got away from making clothing as I threw myself head first into making quilts. With the chaos of the move and the lack of quilting mats/rulers/furniture, I've been hankering to make clothing and have the recently acquired pattern collection to prove it.

Finished Washi Dress

Despite recent temptations, it seemed wise to kick things off with a gander through the WIP pile. I started my version of Rae's Washi  Dress last Fall but made almost no progress after cutting it out and hand tacking the bust darts. I started working on it again while at Kelsey's in July but didn't get the sleeves bound or the bottom hemmed until last weekend.

Finished Washi Dress

When Kelsey suggested that we make Washi's together, I picked a fabric from my stash (for what might have been the first time ever). The fabric is an old Amy Butler print that I bought years and years ago to make some sort of 50s style New Look dress pattern. Since I don't have many occasions to wear a full circle skirt, making a Washi was a much better choice.

I went with a size medium and it was pretty close to a perfect fit. The only alteration I made (if you can even call it that) was to follow the Mr.'s advice to show a little more leg when it came time to hem. I will definitely wear this with a belt as the combination of empire waist and intense floral quilting cotton was a little too maternity inspired for my taste pre-belt.

Washi Dress Neckline

After much debate, I opted for the "U" neck cutout which I really like. It helps pull the floral away from the face a little more which keeps things from looking like I was attacked by a flesh-eating tropical dandelion.

Washi Armhole

I really like the bound armholes that Rae included with the pattern and have caught myself trying to show them off to people more than a few times. Nothing says: "pleased to meet you, I'm new to the neighbourhood" quite like flashing your armpits to almost strangers.

Finished Washi Dress

As usual, my art director lent a critical eye to the photo shoot.

Washi Dress Helper

I think he approves. I'm just tickled pink that there is one less empty hanger in my closet.

Friday 23 August 2013

From A - Finally Finished!

Way, way back in October of last year, I decided to make a quilt in a month....10 months later, my Salt Air Smitten quilt is finally done. 


Finished Smitten Quilt 

This was one of those quilts where I was constantly oscillating between loving it and hating it. Final verdict is love. I love the primary colours, the outdoorsy theme (people in canoes, mermaids, whale tails, water, butterflies!) and the playful feel of the blocks make it a perfect choice for my good friend's daughter as she transitions into her "big girl" bed.


Finished Smitten Quilt

The backing fabric is also from the Salt Air line. I had a temporary lapse in consciousness one day at my LQS when I decided to buy 5 meters of this super busy stripe fabric. I have no idea what I thought I would do with that much yardage of this particular print. Talk about crazy quilt back. I think that the strip in the middle helps tone it down just the tiniest little bit, but it is still pretty wild.


Finished Smitten Quilt

One good thing about this backing fabric is that it has built in spots to write in your quilt details. This was especially useful as the movers still haven't appeared with our stuff and I don't have any scrap fabric to make a label with. I also like that it's a little more subtle than having a stand-alone label.


Finished Smitten Quilt

I made a few mods to this pattern. First I added a fifth row of blocks to the quilt to get something that was a little more bed shaped instead of square. I also changed up the borders and made them all different widths so that they move from narrowest to widest out from the middle of the quilt.


Finished Smitten Quilt

This is my first machine bound quilt. I used this tutorial. I had tried to machine bind my Posy quilt but didn't like how much the binding was overlapping on the back and ended up stitching it by hand. This time, I cut my binding strips to 2" instead of my usual 2.25" and that seemed to do the trick. It was slow going but overall, I am happy with how the machine binding turned out.


Finished Smitten Quilt

Final Quilt Details:


  • Quilt Name: Smitten for Savita
  • Finished Size: Twin (72.5" x 87")
  • Fabric: Kona Cotton in Snow, Salt Air by Cosmo Cricket (3 charm packs and some yardage)
  • Pattern: Smitten by Rachel Griffith
  • Quilting: Bayside pattern by Lindsay of Eileen Quilts


  • Finished Smitten Quilt

    This quilt is also the first time I sent a quilt to a long-arm quilter to be quilted. Let's just say that with a quilt this size, it was a good decision. This would definitely still be in the WIP pile if I had to face the prospect of shoving this through my machine to try and quilt it myself. Also, I'm a big fan of the wave pattern Lindsay used. I think it ties in nicely with the quilt without making it too busy. Here's a better photo of the overall effect of the quilting.

    Finished Smitten Quilt

    You probably figured from the sheer number of photos in this post that I'm glad this is done. I know that my friend's daughter will love it to pieces.

    Finished Smitten Quilt

    Linking up to Finish it up Friday at Crazy Mom Quilts. Take a look-sy. There are some beautiful things there this week.

    Wednesday 21 August 2013

    From K - Pink Pluses Quilt Top

    I'm juggling a lot of WiPs lately, but my priority right now is a project I'm putting together for Quilting for Calgary.
    Most of the pink fabrics in this quilt were generously donated for the cause and I had a great time turning them into something modern. I am typically not a huge bubblegum girl so this has been an amazing way to break out of my safe zone. Together with a few red-pink fabrics from my stash and a whole lot of gray prints, this quilt has really developed into something fun.
    The donated fabrics were cut into 3.5" WOF strips, so I knew right away I wanted to come up with a pattern that would maximize their size. While debating my options, an amazing large scale plus quilt by Leanne (from She Can Quilt) hit my bloglovin' feed and I knew it was a perfect pattern choice.
    Last night I made the backing and spray basted the layers. I'm hoping to toss in a few pins tonight and then get quilting ASAP! I am super excited to quilt this because I'm going to try a new FMQ technique, and also because I just splurged on a new Janome 8200 - eek!
    Here's a quick peak at my two Janomes side by side (4100 and 8200 models respectively). I apologize for the poor lighting in the evening shot but I swear this photo serves a purpose. Since I do the majority of my sewing in the evenings, I am especially excited about all of the LED lights that this new machine has. Between that and the 11" throat space I am absolutely smitten. Everything beyond that is absolute icing on the cake and I am so beyond thrilled.

    Now I hope that you can excuse me while I skip my way back to my sewing room.
    Linking up to WiP Wednesday over at Freshly Pieced.

    Sunday 18 August 2013

    From A - WIP-a-licious

    Has it really been almost a month since my last post?!? I'm glad that Kelsey has been holding down the fort. We have finally made it to California and after a whirlwind weekend back in Toronto and almost a week of living in a hotel we are finally in our new place and trying to settle in (as settled in as you can be when your only furniture is a mattress on the floor and a computer chair/desk).

    The general lack of order in my life is also reflected in the growing mound of WIPs that have taken up residence in the corner of the living room that would ordinarily be home to a couch or end table.

    Smitten Quilt WIP

    I got my Smitten Quilt back from the long armer and am happy with how it turned out. All this needs now is some binding and a label. This is going to get finished as soon as I find a quilt shop that is willing to give me 10 minutes with their cutting mat and 6" x 24" ruler as mine are on a truck somewhere between Toronto and California.

    Meadows Quilt WIP

    Most of the blocks for my Meadow Quilt were made on our road trip. Just need to get them sewn together and figure out the whole boarder/backing situation.

    Washi Dress WIP

    When I visited Kelsey in Calgary last Fall, she had the crazy idea that we should both make Washi dresses while I was there. Although I managed to cut the fabric for my Washi, I never really made any more progress with it. I worked on it again on the road trip and now it just needs to be hemmed before it can find a more permanent home in my closet.

    Staple Dress WIP

    During my most recent visit, I was to blame for deciding that we should both make Staple dresses when I was in Calgary last month. True to form, Kelsey finished hers and mine is still somewhere between started and wearable.

    Here's hoping I'll have some finishes to show you soon! I should probably clear up that pile of WIPs before the couch actually arrives.

    Thursday 15 August 2013

    From K - Pink Pieces

    I'm taking tomorrow off and starting the weekend early. It looks like my future is going to be filled with shades of pink. Quite a shift for me, but it's all in the name of charity so bring on the bubblegum!


    I'm working towards some finishes this weekend, wish me luck!

    Monday 12 August 2013

    From K - Finished Sew Positive Baby Quilt

    Last month I had the privilege of pattern testing a new design by Elizabeth Dackson of Don't Call Me Betsy. Elizabeth sent over a draft of her new pattern, Sew Positive, and this is what I whipped up with it.


    Her design is versatile and gives even brand new quilters the opportunity to try something unique but yet still very achievable. The pattern isn't overly challenging, just requires that you maintain a consistent 1/4 seam allowance.

    I completed this baby sized quilt top in an afternoon, including pulling fabric from my stash, cutting and piecing it.


    When quilting this piece, I chose a combination of machine and hand quilting. I used white Aurifil thread to machine stitch around the outside edge of the cluster of four small plus signs (shown in pink in the photo above).
    I used perle cotton in size 8 to hand stitch 3 boxes in each cluster center, as well as dark teal to stitch around each of the large plus signs. I love the effect it gives on the quilt back.

    The backing was pieced using the same fabric as the large plus signs on the front, combined with a strip of green dots to edge the top. I used a large aqua polka dot print for the binding that helps tie the front and back together.

    It was a fun pattern to play with, and would be great for any skill level. It's the kind of pattern I can see myself making over and over again for a few reasons:
    1. I would love to make a scrappy version (scrappy background or scrappy plus signs, you name it and I'm sure it'll look great);
    2. It would be neat to make one with a colorful background and white plus signs or something that is two toned; and
    3. High volume vs low volume prints anyone?

    Hop on over to Elizabeth's blog today to read more about her Sew Positive Pattern and where you can get your hands on it.

    This marks my first completed project for the Q3 2013 Finish A-Long - read more about my ambitious finishing goals here.

    Sunday 11 August 2013

    From K - Stash Sneak a Peek

    When the hubs and I decided to head down to Seattle, I immediately took inventory of my current quilty WiPs and future planned projects. Shipping to Canada is so expensive these days its downright robbery *insert fist shake at USPS here*

    Knowing I'd have the opportunity to order fabric online and ship to a friend's house in Seattle, I went a tad bit crazy stocking up my stash. Here are some future garment projects - enough for three shirts and 2 dresses.

    I also thought of myself as being quite "responsible" by purchasing costly yardage for planned quilt backs and saving on shipping (I'm sure you're nodding in agreement).

    Being not quite so responsible, I thought I would treat myself with not one or two FQs of Sarah Watson's Indian Summer line... but an entire FQ bundle. Oh dear, this definitely pushes me into "no more fabric purchases mode"... well at least until Sewing Summit in September :)

    And now because you're probably scratching your head wondering where I plan to store all these goodies, let me introduce my craft storage closet.

    My current projects are taped up on the wall with washi tape. It helps keep me focused on the tasks (and due dates at hand).

    I bought this closet on Kijiji for less than half of what they charge at Ikea and while my husband thought it was still a bit costly, we both value how useful it has been at keeping my crafts reigned in.

    The white boxes on the very top shelf hold our tax papers, my little yarn stash and knitting needles, and a box of sock monkey materials.

    The next shelf holds three baskets (that are supposed to hold the three WiPs I'm currently working on, but honestly they are full of baby flannel and wax print fabric right now). Next to those baskets is my modest selection of quilt books.

    The third shelf stores some of my yardage, aerosols (starch, 505 etc), patterns and little boxes of labels and fasteners (zippers, velcro, snaps, ribbon etc). This shelf also holds an affordable Ikea planter that my Perle cottons sit in.

    You might notice a sweet little FQ bundle of Kate Spain's Cuzco line that I recently won in a super generous giveaway by Shayla and Kristy over at Sassafras Lane! Gosh do I ever feel like a lucky lady! I can't wait to cut into this bundle really soon.

    In the second drawer, I have an assortment of garment and quilt back yardage, as well as a few fabric collections (Indian Summer and 1001 Peeps), a quilt that I haven't shown on the blog yet.

    This drawer also holds a whole lot of stash blenders. I tend to collect 'tone on tone' prints (without very much white) for the most part as I find they fit easily into projects. Many of these were from this past years' Stash Stack Club.

    The next drawer holds a bit more fabric yardage, as well as my scraps. It looks pretty disorganized but if you look closely I have 4 clear plastic bins. The 1st holds red, orange, yellow and pink scraps. The 2nd holds green, blue and purple scraps. The 3rd holds black, grey and white scraps, and the 4th bin holds solids.

    I'm looking to start a Canadian Scrappy Bee soon for anyone else you might be interested in sewing up some of their scraps and shipping them cross country. Fellow Canucks, let me know if you'd be interested.

    The three drawers below this one hold:

    • Batting, interfacing, Pellon etc
    • Cross stitch, embroidery and other hand projects, as well as my glue gun and small scrap booking items.
    • Miscellaneous drawer. Mostly holds UFOs and WiPs (of various craft types).

    I hope you have enjoyed a sneak peak at how I store my stash (sorry it was a bit long winded). I'm linking up to 'Sunday Stash' over at Finding Fifth and 'You Show me Yours, I'll Show you Mine' over at Sarah Quilts. I have had such a blast checking out how everyone organizes their stash on Sarah's blog and I was thrilled to hear she extended her linky party. Come check out all of the fun!