Showing posts with label hit list. Show all posts

Monday, 28 April 2014

From K - Travelux Pearl Sewing Hit List

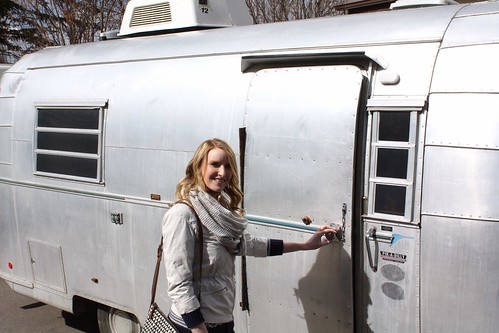
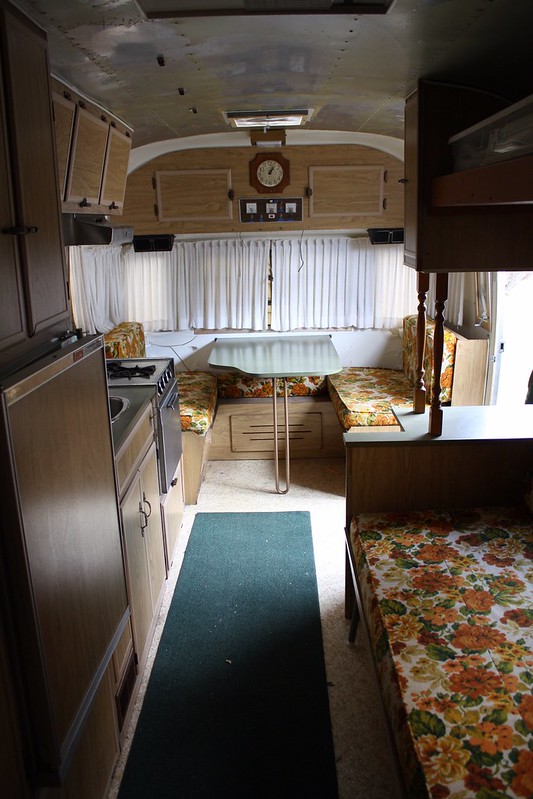
Today I'm excited to introduce you to my new weekend getaway... my home away from home... my sweet little humble abode in the woods... The Travelux Pearl.


I literally sigh just saying those words out loud, I am SO excited! Three weeks ago we drove 2,000 km to pick this little pretty up and I've been smitten ever since. It's a 1972 ninteen foot Travelux trailer (the Canadian version of an Airstream).

The previous owner named this trailer 'the Beast' which seemed far from fitting for it's tiny silver stature. The instant the keys were ours, we renamed her the 'Travelux Pearl' to emphasize the true rarity of this trailer.

We've spent the last few weeks plotting and planning our trailer reno, and she's gonna get a total overhaul (we're talking GLAMper status people). While my hubby is busy wielding the woodworking tools, I've been writing out a sewing hit list (what you didn't think this post would be fabric/crafting free did you?!).
Here's my hit list so far:
  • Constellations Bed Quilt;
  • Hubby's Camping Quilt (special by request);
  • Upholster new foam cushions;
  • Sew and install curtains;
  • Sew som throw pillows; and
  • Make a puppy bed.
I've got a deadline of July 23rd to finish these projects so I better get a move on stat. If anyone has any glamper, camping or upholstery tips I am all ears! I'm jumping into the deep end with this one.

Wednesday, 16 October 2013

From A - Open Wide

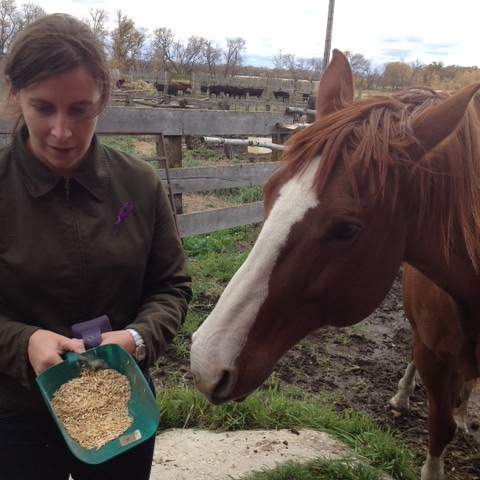
Both Kelsey and I were fortunate enough to spend last weekend in Manitoba with the family celebrating Thanksgiving. We spent some time hanging with the family pets.

Pony!

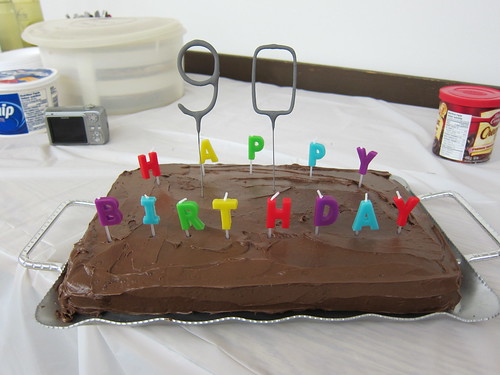
We ate way too much delicious grandma food and had a blast at the much anticipated 90th birthday party for our favourite great aunt.

90th Birthday

It was a whirlwind of a weekend (always the best kind) and after coming home, I feel refreshed and renewed. So much so that I actually managed to knock something off of the moan and complain list.

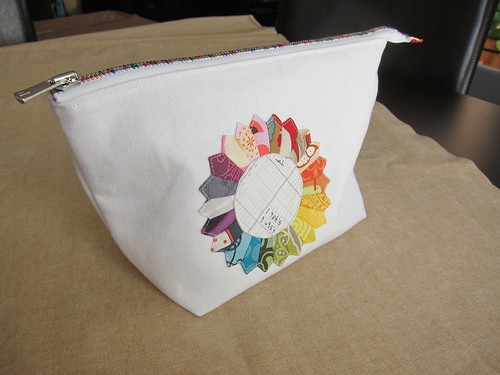
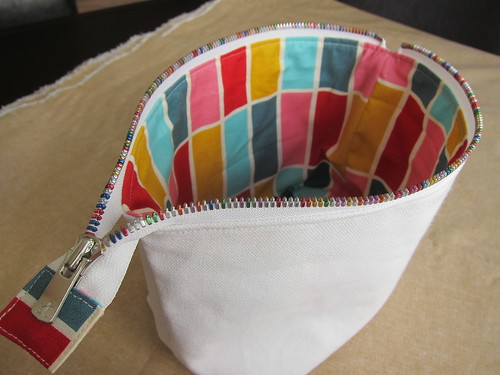
Open Wide Pouch

Noodlehead's Open Wide Pouch. Much better than a trip to the dentist.

Open Wide Pouch 

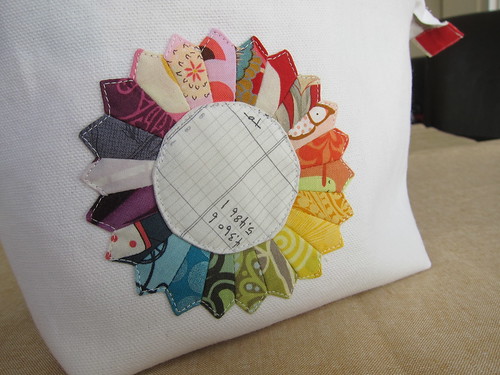
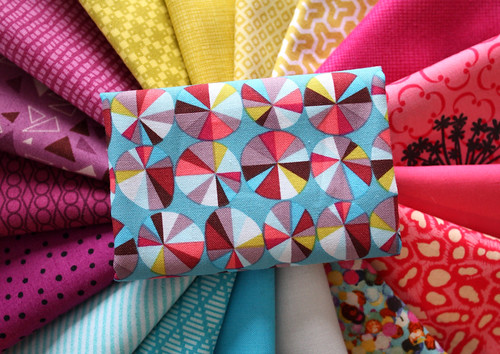
I took Jessie's mini dresden class at Sewing Summit and made this little beauty. Anyone who was actually at Sewing Summit has probably already seen it since I was showing it off like a proud mother to anyone who would smile and nod. Look at the duck, the owl...at 4" in diameter it is way too cute!

Open Wide Pouch

Although Jessie suggested mounting it on some canvas and framing it, a weekend spent toting around my rotary cutter in a plastic grocery store bag while ogling all of the gorgeous handmade bags of my fellow attendees made me determined to turn that piece of canvas into a notions pouch.

Open Wide Pouch

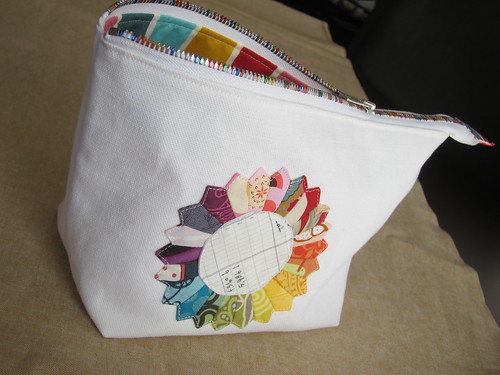
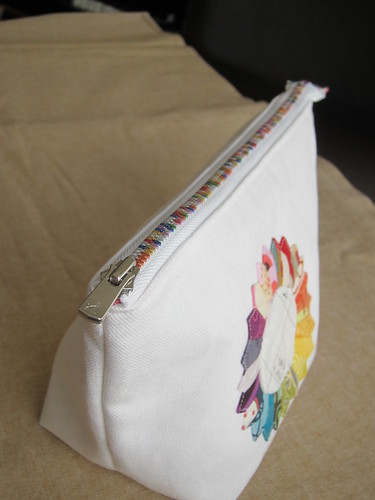
Add a rainbow zipper and a colourful scrap from the stash for the lining and I am now the proud owner of the perfect thing to store my rotary cutter, pins, marking tools and thread.

Open Wide Pouch

Hope all of my fellow Canadians had equally wonderful weekends!

Wednesday, 9 October 2013

From K - Q4 Finish-A-Long Goals

With a number of big celebrations quickly approaching, and Christmas on the horizon, my quilting 'to-sew list' doesn't appear to be slowing down anytime soon. To keep me focused and on track again this quarter, I'm setting some Q4 Finish-A-Long goals.
 
she can quilt
 
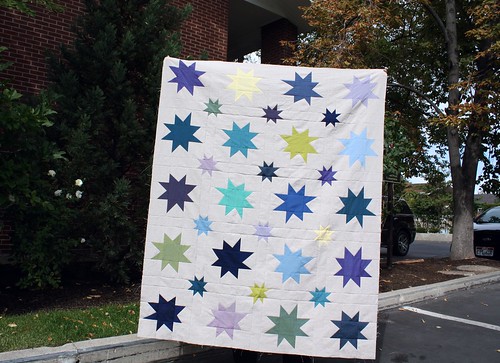
1. Wonky Star Quilt
 

Amanda and I put this top together while we were at Sewing Summit a few weeks back, and now I need to get it quilted and bound before our great aunt turns 90 this weekend (talk about a tight deadline).
 
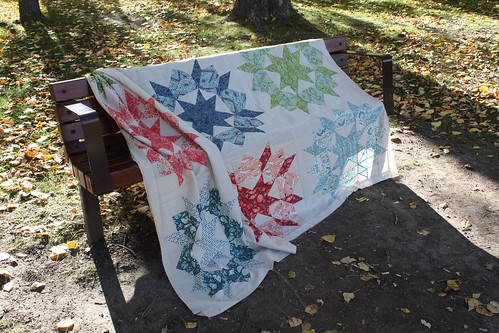
2. Salt Water Swoon Quilt
 
 
I recently finished this top and mailed it to a long arm quilter to let her polish it off. I hope to get this quilt back soon so I can bind it and deliver it to my grandma when I'm home for Canadian Thanksgiving.
 
3. Equilateral Triangle Quilt
 
 
This quilt has been on my to-do list for what feels like eons. I pulled a baby girl quilt stack from my stash last November and it sat untouched until last month when I found out that I was in Jeni Baker's Equilateral Triangle Quilt class at Sewing Summit. I have cut all of my triangles and have started piecing together this quilt for my brand new baby niece! I am reeeeeaaaally excited to make more progress but number #1 and #2 have been monopolizing my time as of late.
 
4. Christmas Quilt
 
 
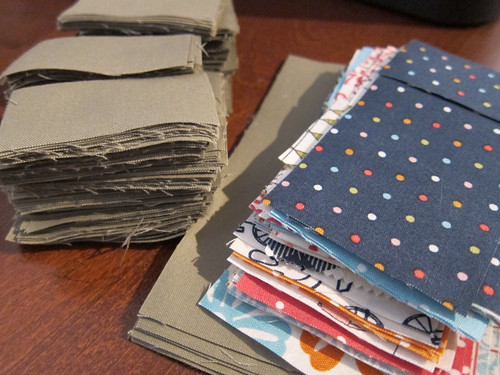
Four years ago when I married my husband, I started thinking about our Christmas traditions and how we could create our own memories together. On our first year, I made a tree skirt and some stockings, but was too nervous to start a quilt. Since this Christmas will mark our fifth together as a little married couple, I figure there is no better time than to finish a quilt. I showed a peek of this stack last week but haven't taken any progress shots yet. Mostly it's a pile of tiny squares at the moment. So. Many. Tiny. Squares!
 
5. Manly Plus Quilt
 
 
When I finished up my Pink Pluses donation quilt last month my husband kept commenting on how 'cool' it was. He also lamented multiple times that week that I have yet to 'make and keep' a single quilt to date. I decided then and there I could do something to fix this problem so I've added a secret quilt on my to-sew list this quarter - and don't worry he doesn't read our blog so no spoilers here! Here is a shot of my fabric pull. Most of the strips have already been cut when I was able to a moment at home by myself but it's pretty slow going so far.
 
6. Magic Wax Print Quilt
 
 
I finished this quilt top more than a year ago but have yet to actually quilt it. Since I mentioned in #5 that I haven't kept a quilt yet for myself, I'd like to prioritize this one just for me. It's a sentimental quilt and I truly love it. It's time to fit in a little selfish quilt now - amiright?!
 
Linking up this week to WiP Wednesday.

Friday, 1 February 2013

From K: 2013 Hit List

I recently mentioned in a post that I set myself a new years resolution to finish up my current WiPs. In an attempt to keep things fresh, and to keep me motivated, while simultaneously crossing projects off my 'to sew' list, I thought I could really use an updated hit list. So without further ado, here are my 2013 hit lists:

2013 Sewing/Knitting Hit List:
  1. Sew at least three garments (I'm thinking that a Washi dress, a Wiksten Tova and a Shearwater Kaftan are all spring must haves);
  2. Add a new homemade bag to my collection (possibly a Runaround Bag or some form of duffle bag);
  3. Whip up at least 6 baby/toddler gifts asap;
  4. Make more Travel Handmade items (this year I think that I would like to make baggage tags, a camera strap, an eyeglass case, a cosmetics bag, and a make-up brush roll);
  5. Make some beach essentials (a beach bag and bikini bag are in the works); and
  6. Knit a pair of socks (definitely out of my comfort zone with this one!).

2013 Quilting Hit List:

1. Magic Wax Print Quilt (quilt top blogged here)


2. Moving Walkways Quilt (quilt top blogged here)


3. Black and White Kites Quilt (quilt top blogged here)


4. Camping Quilt (blocks blogged here)


5. AMH Fieldstudy Sundial Inspired Quilt (fabric blogged here)

6. Complete at least 3 quilts using my current stash - which includes various lines by Anna Maria Horner, Tula Pink, Amy Butler, Joel Dewberry, Lucy Summers, Lizzie House, Laurie Wisbrun, Dena Fishbein etc.

Wednesday, 30 January 2013

From A - New Year, New List

I didn't really set any New Year's resolutions this year but the more I got thinking about it I do have quite a few crafty goals for the first part of this year. As more and more things began swirling around my head I realized that it was time to make a list!

1) Smitten Quilt

First up finish my Smitten quilt. I started working on this in October with the best intentions of getting it done in only four short weeks. Life stepped up and gave me a smack with the old reality stick and it's still sitting in pieces in my guest room. I want to get the top put together and get it quilted before another 3 months slip by.


2) Ceres Baby Blanket

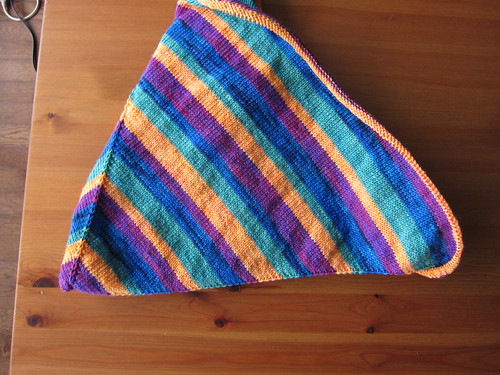
I started knitting this baby blanket for a friend back in November. Things were going pretty well until I ran out of one colour of yarn over the Christmas holidays and had to give it some time in the penalty box. It is so close to being finished that I think it's time to dig it out, finish off the knitting and get it blocked so I can send it off to it's infant owner while she's still small enough to cover her and it's still cold enough that she will use it.


3) Make a Tova

I bought the pattern for this top months and months ago. I made a couple of Wiksten tanks last Fall and have been wearing them constantly ever since. I could really use a few tops with sleeves to round out my spring wardrobe.


4) Postage Stamp Quilt

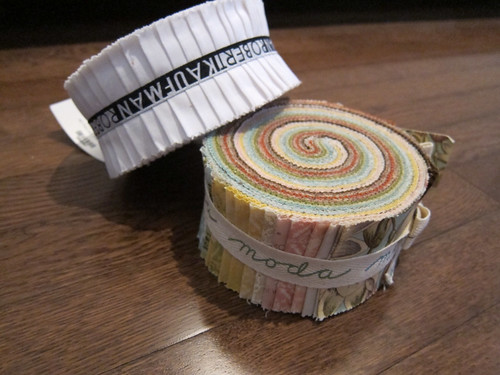
I have been crushing hard since I saw this postage stamp quilt at some point during my online travels. Although I tried to find a Central Park jelly roll so I could make one of my very own, I ended up settling for a jelly roll from the Curio line. I've had the fabric forever and am anxious to finally get started with this one.


5) Plus Quilt

Inspired by Kelsey's gorgeous Plus Quilt, I cut out one of my own using the leftovers from my Carnival Quilt. Although I managed to get it cut out back in late November, I still haven't made any progress on getting it sewn together. I'm thinking this will make a good easy finish/instant gratification project to help break up some of the bigger projects on this list.


6) Linky Love

My sister-in-law is getting married in the Spring and I thought she might appreciate a modern wedding ring quilt. When I saw someone testing out Tracey Jay's Linky Love pattern I knew that it would be just the thing. Best part is that I've had this Good Fortune jelly roll collecting dust in my stash and I think the colours will be great for this purple obssessed bride-to-be.


Time to get cracking!

Sunday, 23 September 2012

From A - Tanks, That Was Fun

After a truly crazy week, I managed to finish my second Wiksten Tank and take advantage of a few hours without rain to get some outdoor modeled shots of both tanks.

The first one I made was a bit of a muslin before I started cutting into my prized Liberty of London tana lawn. The fabric I used for this first one is a gorgeous quilting cotton from Martha Negley's Farmington collection.


I really love this print and plan to use it as the lining in the duffel bag I plan to make in the next few weeks.


The second one is made from my precious stash of tana lawn in Wooky Hole. I love the seemingly random mixing of colours in this fabric. The print has so much variation and detail. It really reminds me of striations found in rocks and minerals. As with my feather tank, I took the time to make a perfectly matched breast pocket.


This is the first time that I've actually sewn with any of my Liberty. It is such gorgeous fabric with such a fabulous hand and drape. It was definitely a bit nerve racking to sew since the fabric is so fine and lightweight. I'm hoping that this simple tank will inspire me to crack into my Liberty stash and make a few more projects from it before too long.


I am really surprised how the different drape in the two fabrics changed the way each of these fits. I don't make many garments but I'm really happy with how these tanks turned out. I've been wearing them constantly since finishing them up (with cardigans since the fall chill has definitely set in).


Hope you are all enjoying a fantastic weekend!

p.s. - is anyone else beyond excited to get their hands on Liberty's line of quilting cottons? I'm stalking searching etsy and other favourite fabric sellers websites almost daily. I'm hoping to get my hands on a FQ bundle of all 55 prints. Let me know if you have any leads!

Wednesday, 19 September 2012

From K - Magic Wax Print Quilt Top

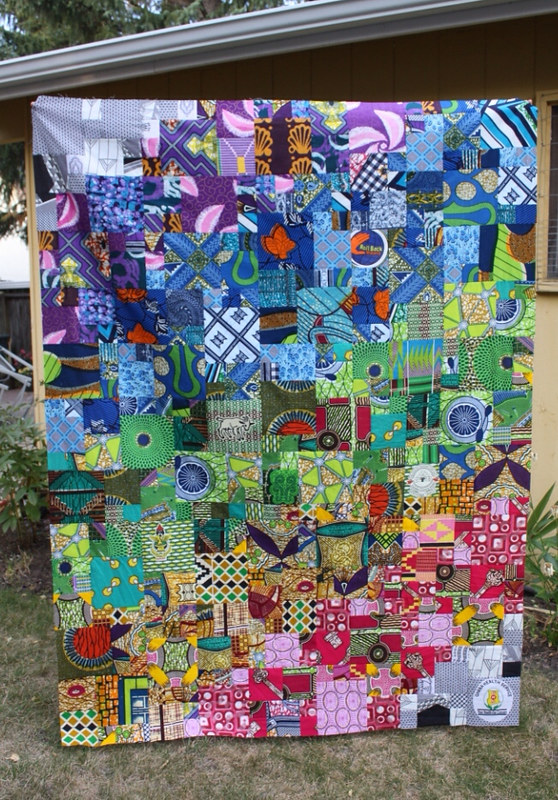
I'm fresh off vacation, soaking in the crisp cool fall air, and polishing up my first of two wax print quilts has been weighing heavy on my mind. This past weekend I hunkered down and pieced together my quilt top, using the magic number squares that I had previously prepared.


Because this quilt top is created entirely out of remnant fabric pieces brought back from Ghana, I didn't have a consistent range of prints in each color, so I did my best to distribute my prints as broadly as possible within their colour grouping. Using 2.5, 4.5, and 6.5 inch squares, I arranged my quilt top using a loose rainbow gradient to help provide a general sense of organization to the quilt.


Last Friday I had an unfortunate run-in on the basketball court and now my foot is sprained... and hopefully not broken (tomorrows x-rays will tell). Determined to finish this quilt top over the weekend though, I took the opportunity to put my 'Start/Stop' Button into good use while I elevated and iced my ankle. I have to say that it was a little awkward at first, but in general, it worked quite well for straight line piecing. On a slower setting, and using a few pins, I even managed to line up my seams quite well.


Though this is just the first of two quilt tops I plan to make with this fabric, I am pretty pleased with how the first one turned out. Playing around with magic numbers was a fun experiment, however it was more time consuming that I had originally thought it would be. For my second wax print quilt top, I might just do some improvisational piecing and we'll see where that leads.


This week I plan on taking a break from the wax prints and starting back up on a couple of baby gifts that have been on the back burner. I'm looking forward to a couple of fast completed projects in the future.


Thursday, 13 September 2012

From A - Denial

While most crafters look to their stashes for wools, flannels, and other materials that might fend off the cooler nights that inevitably begin making an appearance this time of year, I keep thinking about summer and how I'm not quite ready for the upcoming change in season.

Although it is dark when I when I wake up in the morning and the sun is usually setting on the drive home from work, I keep hoping that there will be just a few more days where I will be able to enjoy the heat of sun on my skin before scarves and heavy sweaters take over.

There's no better way to celebrate this optimism (a.k.a. total denial) than to make a breezy summer tank. That's right. After almost 2 months of procrastination, I have finally managed to finish my very first Wiksten tank.


This pattern is so well written. All of the seams and hems are beautifully finished, effectively making what is a very simple tank into something that is really special. I was so inspired by these details that I even took the time to fussy cut a perfectly matched pocket. You really have to look for it to see it on the finished tank.


I have a serious hatred of hems. Hems are probably one of the main reasons that I make so few garments. The hem on this tank is especially heinous since it is essentially just a series of curves that I'm sure were specifically designed to test my patience. After about 45 minutes of burning my fingers with the iron while futzing with the hem, I remembered a tutorial I happened upon a while back. This sneaky hem trick made the rest of the project easy and the whole thing came together in the course of one evening. Gotta love instant gratification sewing.


Modelled shots to come but in the meantime, I'm thinking I might just have to whip up at least one more of these.

Monday, 3 September 2012

From K - Craft Room Reveal (Part 3 - Design Wall)

Welcome back to the third and final episode of my mini craft room reveal. The last and final wall of my craft room is the wall that has me most excited... why you ask? because it's a ginormous design wall of course (emphasis on gi-nor-mous)!

When you first walk into our new craft / sewing space, this is your typical first glimpse of the room:


You'll notice that two of the walls are pretty bland, and pretty white... but that's all to ensure that the main feature of the room is always ever changing, and consistently remains the main feature. Right now that wall is looking a little something like this:


Look progress on my first of two Ghanian wax print quilts! But I digress... so back to the topic at hand.

This design wall has been a work in progress for some time now. I am fortunate to have an amazingly handy husband and he took some serious time planning this sucker out to make it just right. It didn't always look like this... actually to be quite frank, it looked a lot like this for some time:


The hubs used a combination of three foam insulation boards, two sheets of white laminate, and some remnant wood to create two portable 6.5' x 4' foot design panels (6.5' x 8' feet when combined). Each design panel is hung using hardware found at a local hardware store, and the panels can be moved about using handles that are attached to the outside edges.

  
Undoubtedly my favorite aspect of this design wall thought is that it's multifunctional! When I hang the board batting side out, I can lay out a project. If I hang the panels laminate side out I can spray baste a quilt, and if I lay the panels out on the ground, I can use the laminate side to pin baste on (saving our hardwood floors from future scratches).

Because our walls are near white right now, the back of my design board doesn't show up prominently, but here is a peek to settle your curiosity:


I count myself truly lucky to have my own sewing space, and a giant design wall is definitely the cherry on top. This wall is going to get some major use!

Wednesday, 29 August 2012

From K - Craft Room Reveal (Part 2 - Stash Storage)

Before I had a craft room, I had a craft closet, and before that it was a simple craft trolley. About 6 months ago I decided a trolley wasn't cutting it anymore, but I hadn't yet committed to downgrading our guest room. As a compromise I invested in a practical storage cabinet so every little scrap could have a home.


While this closet didn't solve all of my sewing woes (like providing a dedicated corner to sew in), it has been one of the smartest sewing related purchases I've ever made (for my sanity especially!). I thought that during my sewing room reveal you might want a peek at where all the goods are stored, and how I manage my stash.

Lets open those doors up and have a peek shall we?


This closet system is roughly 8 feet tall, and while I'm nearly 6 feet myself, I figured that top shelf wouldn't get all that much use. I used a couple of large boxes from Ikea to keep it simple and store items I don't use as often, such as wads of stuffing, and sock monkey materials.


On the second highest shelf you can see three wicket baskets that I found at my local Shoppers Drug Mart. I put a blue tag on each basket listing the current contents. These baskets are my  valor laden effort  desperate try  half successful attempt at organizing my current WiPs and keeping them down to a reasonable number. The first basket is full of baby fabrics for various projects and I don't see that tag being removed anytime soon. The second and third baskets currently hold my wax print fabrics while I work at completing those two quilts.


Below the wicker baskets I have a shelf that holds my mini fabric bolts of 0.5m or greater (I use comic book boards as bolt supports), as well as various spray bottles (glue adhesive, 505, spray starch etc). I used some smaller ikea storage boxes to house my receipts, labels, fasteners, and resources (including patterns, colour charts and inspiration photos). Lastly there is a binder along the right side that holds my purchased PDF patterns that I have printed out.


I won't bore you with the layout of each drawer but I will show you a couple to satisfy your curiosity (you know you want to see inside!). Here is a peek of the top drawer. From the back, left to right, it's filled with mini quilt sandwiches to practice free motion quilting, my Machinigers, a collection of storage bags for projects on the move, and a large stash of Shout Color Catchers. In the front row, I have a sewing box filled with notions, the stitch chart for my Janome, a basket of selvages, and an assortment of fabrics by Anna Maria Horner (Innocent Crush), Amy Butler (Soul Blossom), Joel Dewberry (Heirloom, and Aviary Two).


The second drawer holds additional fabric storage for a number of completed projects that will soon be gifted, my Janome quilting extension table, yardage (4+), charm packs, some miscellaneous FQs and two quilt projects that are up and coming (I custom bundled each using various fabric lines).

 
The third drawer in my storage cabinet holds my scraps. I tend to toss very small scraps and hold onto the somewhat larger pieces that are most likely to be used. The first bin holds red-orange-yellow-gray scraps while the second bin holds green-blue-purple-grown scraps. The third bin holds black and white scraps, and the forth bin holds solids. I can guarantee that more scrap storage will be needed soon but there is still quite a bit of space to space behind those bins for when I spill over.


The last few drawers hold my batting, thinsulate, and template plastic, along with my non-sewing related craft supplies like paper, frames, punches, stamps etc.

I am really glad that I invested in this cabinet and I love having everything organized and at my fingertips now. It allows me to rearrange my stash, take inventory of what I have, and prepare upcoming projects, all while looking at my options in one place. Call me weird or call me crazy, but this closet is my happy crafty place.