Showing posts with label wearables. Show all posts

Friday, 8 August 2014

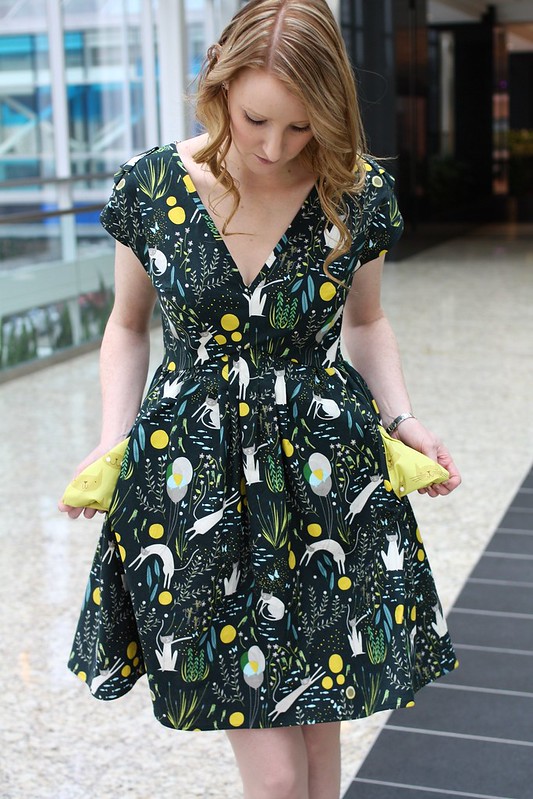
From K - Simplicity 1877 Catnap Dress (the 2nd)

Nearly six months ago when Lizzy House announced her Catnap Dress Contest, I immediately dreamt up a Simplicity 1877 dress using a lavender coloured catnip print from her new line. After quickly realizing the contest required use of an actual cat print from the line, I switched gears to make this dress... but not before tossing this lavender catnip print in to my shopping cart.
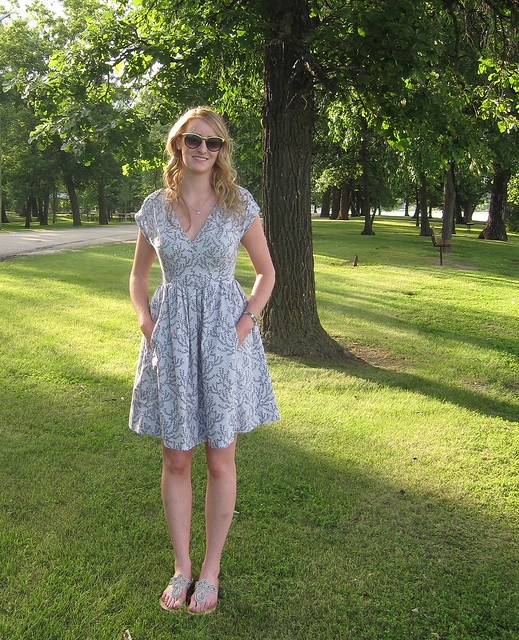
Months passed but I still couldn't shake the dress idea from my mind, and my desire for a new dress for the Calgary Stampede was growing. So in typical last minute Kelsey fashion, I finally whipped up this dress 48hrs before my first stampede event of the season... even stitching the hem on my commute.
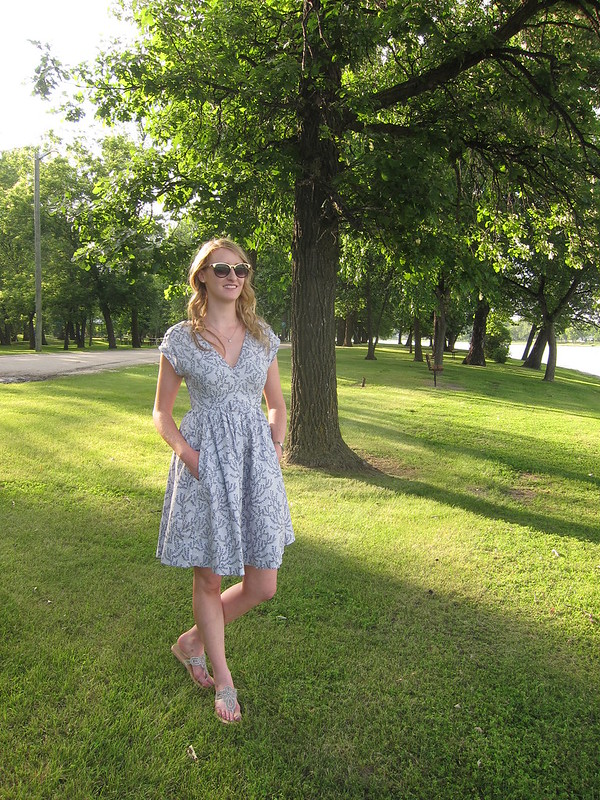
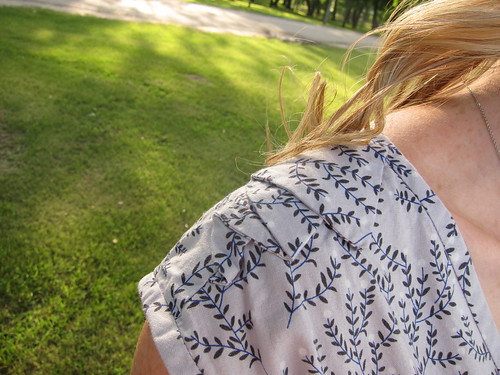
Since I had previously used the pattern and had the yardage on hand, I was able to sew this up in two (long) evenings, no alterations required.
For stampede I paired it with a brown leather belt, cowboy boots, and of course a hat, similar to how I styled my handmade stampede dress last year (shown here). Sorry I didn't seem to get any stampede pictures this year.
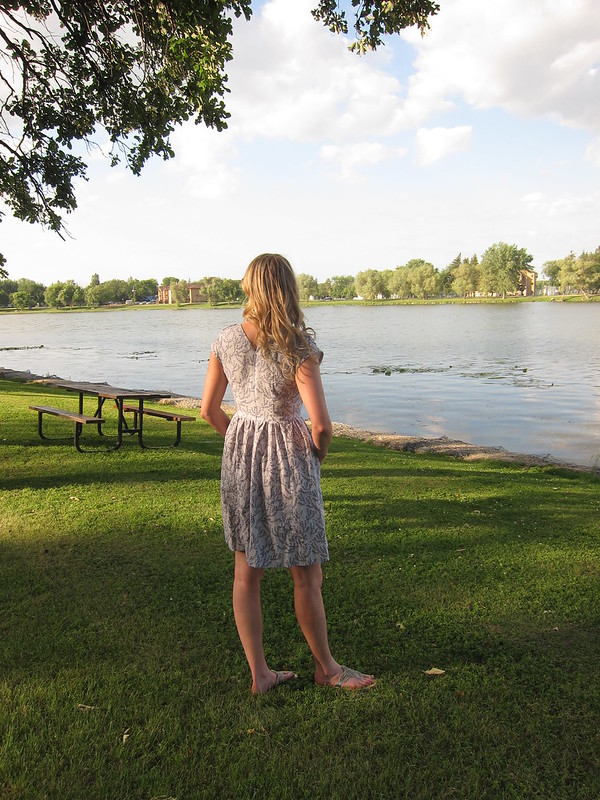
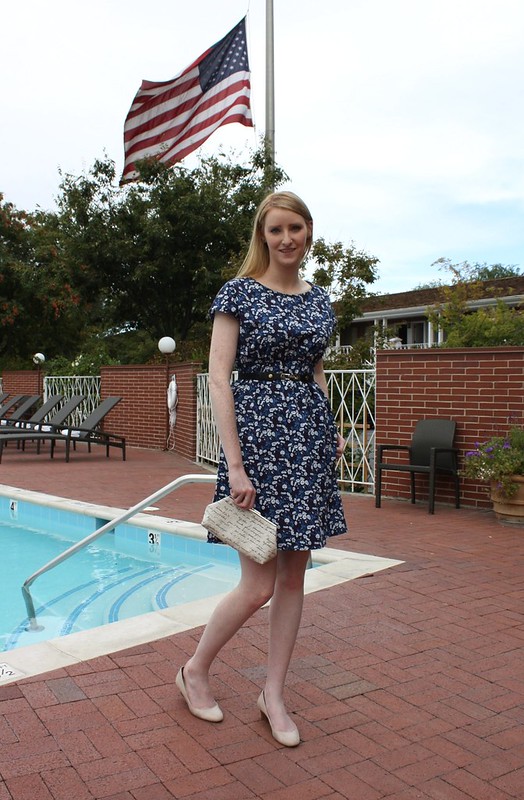
Last month when Amanda and I were back in Manitoba for a wedding, we both sported handmade dresses to the rehearsal supper and she took some photos for me afterwards.
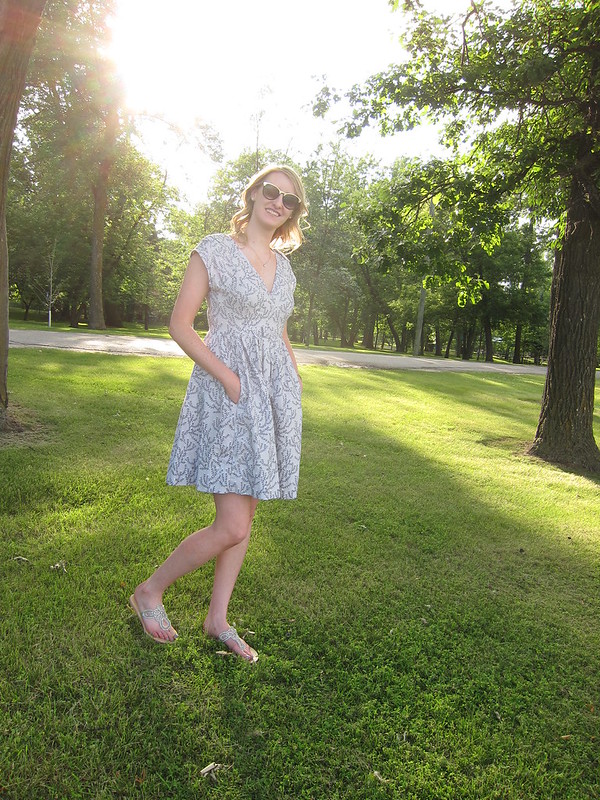
I honestly can't say enough about how much I love this pattern. I wear my original catnap dress a lot, but this one is getting even more rotations in my wardrobe already. Great pattern, original fabric, what more could a girl want!

Wednesday, 16 July 2014

From A - Plantain T-Shirt

This year I set two challenges for myself. The first was to track how much fabric I used in a year and the second was to finish 12 quilts and 12 pieces of clothing over the course of the year. Although things started on the right foot, I quickly fell behind as things started to get crazy in March.

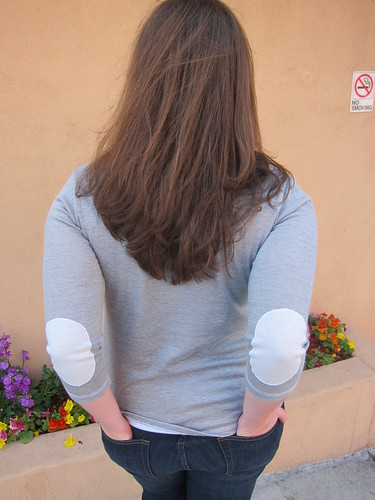
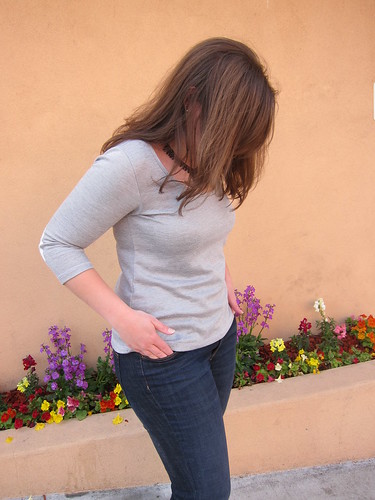
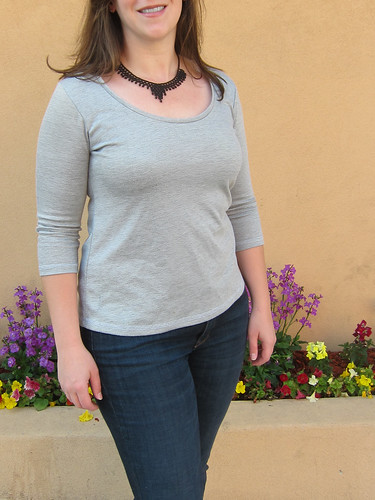
To date, I've finished three quilts and two pieces of clothing. The second is the Plantain T-Shirt, a free pattern offered by Deer and Doe, opting for the 3/4 sleeve.

Plantain Tee

I used a shimmer pinstripe jersey knit. It's a two-sided fabric which means that it is a reversible mid-weight. I ended up using the sparkly side of the fabric for the elbow patches. I ended up just sewing them on with a ball-point needle and a small, tight zigzag stitch to finish the edges.

Plantain Tee

As always with knits, this top was fast, easy and satisfying. The fit turned out all right considering the lack of modifications to the pattern and my general disregard for anything resembling accurate body measurements or a muslin.

I've gotten quite a lot of wear out of this top since finishing it in February. I can see myself making a few more of these tops for next winter.

Plantain Tee

Here's hoping I can get caught up on my 12 in 12 goals over the next few months. I started quilting a baby quilt last week and cut out some fabric for a new dress. More on those soon!
Monday, 21 April 2014

From A - Red Carpet Lady Skater Dress

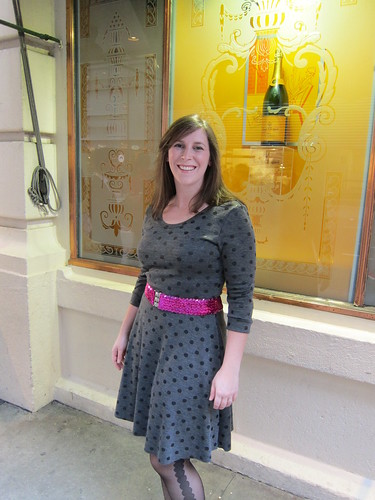
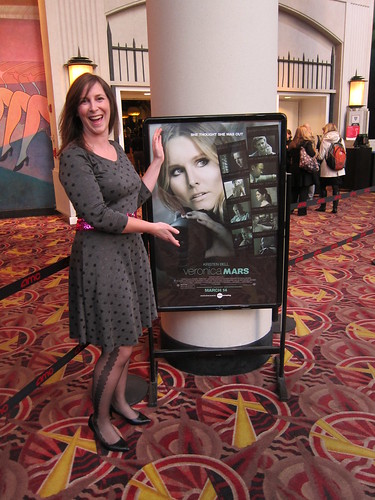
In early March, or what feels like a lifetime ago, I was lucky enough to get a ticket to the Veronica Mars Movie premier and after party in New York. Not one to have already have a dress for such occasions, I decided to try making my own (partly because I am cheap and definitely because I hate shopping).

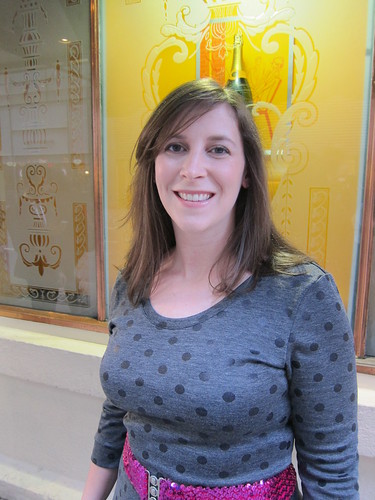
I wanted something that would be dressy enough for the premiere but casual enough that I might actually wear it again. Kitschy Coo's Lady Skater Dress in some black polka-dot knit fit the bill perfectly.

Lady Skater Dress

I dressed it up with a sequin belt that my grandmother bought me when I was about 8 years old and some fancy nylons I picked-up in the big apple. I even wore make-up. Overall, a passable red carpet outfit for about $35.

Lady Skater Dress

I literally got up at 4:00 in the morning to finish sewing the dress together before my 6:00 a.m. flight (which meant no muslin on this one). The fit is is a little looser than I would have liked but otherwise fantastic considering my recklessness.

Due to the last minute construction, I didn't have time to hem the dress before getting on the plane. Luckily this wasn't a problem with the knit fabric. The Mr. was relieved that we weren't going to miss our flight when I decided to skip it and very happy that the coverstitch machine wouldn't be joining us in NYC. I'm hoping to give my lady skater a nip/tuck plus hem treatment soon.

Lady Skater Dress

This pattern was quick and easy. The finished dress is lovely, comfortable and has now been fondled by the V-Mars cast, which makes it a definite winner. There are definitely more of these in my future (likely a peplum tee version in the next size down).

(And yes, the premiere was awesome...I even met Ira Glass. He is the coolest.)

Friday, 21 February 2014

From K - Kitty Dreams Dress

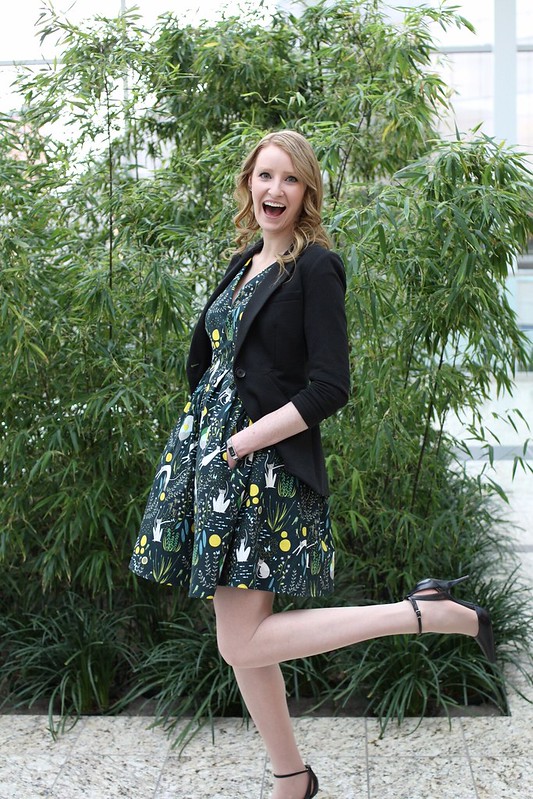
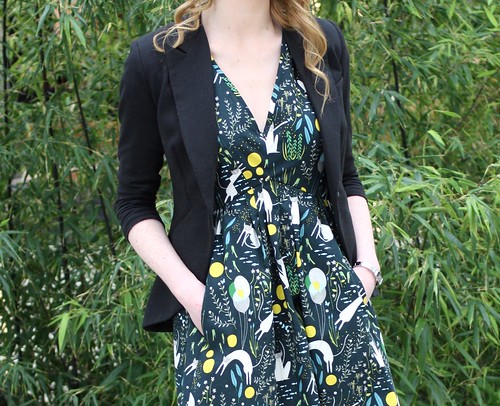
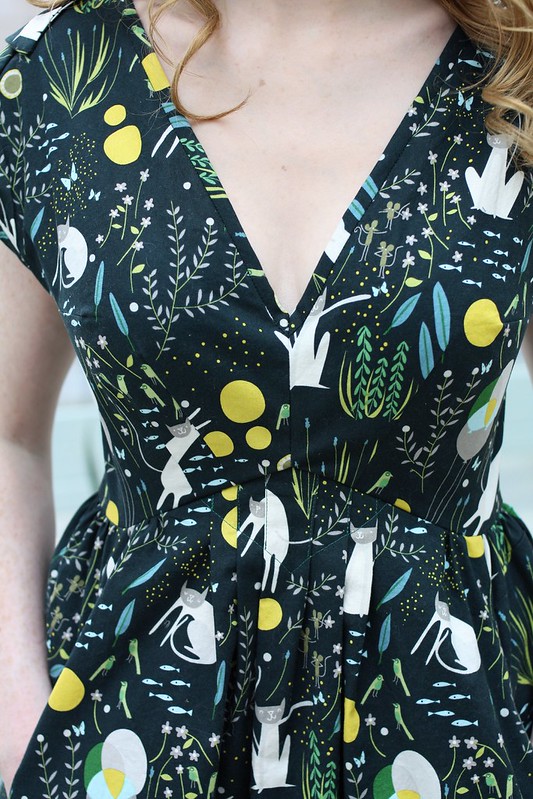
I named this dress after the fabric line, but honestly this dress could easily be be renamed Kitty Kelsey's Dreams Dress as it's everything my dreams are made of and more. A dress with a wonderful fit, an amazingly whimsical print AND said print has cats, balloons, mice and butterflies no less!

When Lizzy posted about her Catnap Dress Contest last month I literally stalked the internet for a local shop (or even a Canadian online shop) that had yardage. Turns out no one in Canada had received their shipments yet from what I could tell so I bit the bullet and ordered from Stash Modern Fabrics about 10 minutes after the contest was introduced.
I then proceeded to pace around my house impatiently with my house cat Joey for nearly three weeks while it made the maiden voyage up to Canada. After customs played with it for a while, they eventually passed it along my way and I frantically started cutting, serging and sewing this week - and gosh was it ever fun!

Lizzy wanted to see how we would wear our kitties on our sleeves, so I sported this to my very corporate job yesterday, styling it with a blazer and some killer stilettos to show you that kitties can have a place in the office, even amongst the all the suits.

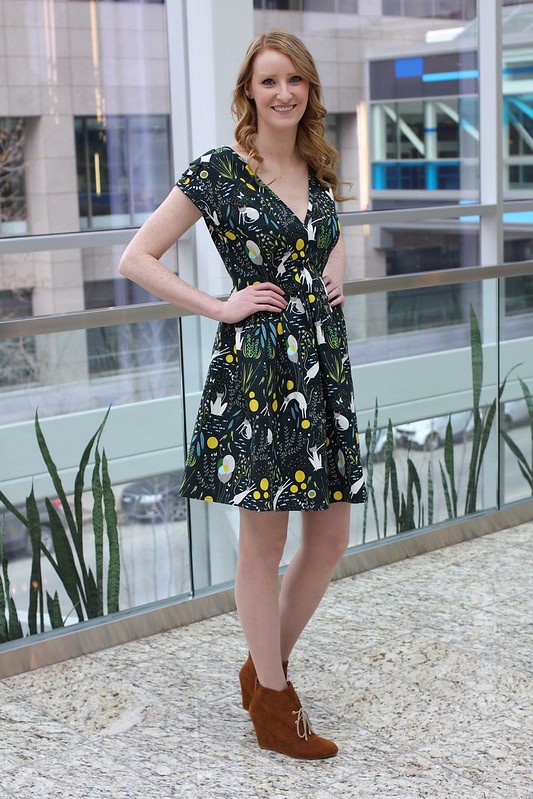
It seemed fitting to also show you how I intend to wear this out and about on weekends since I see this quickly becoming a wardrobe staple. I paired it with a cute pair of suede booties but I see moccasins in my future with this dress too! 
Right from the beginning I knew this Kitty Dreams in Grass print was just begging for some lime green pockets and I love the extra detail it adds. I'm quite certain that it's a commonly known fact that fun linings make everything 100x better.

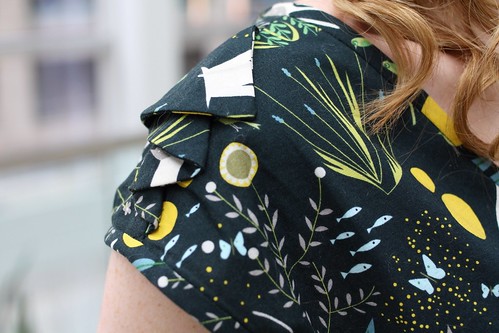
The shoulder flounce on this dress is the kind of detail that makes me swoon. Simple, subtle, not terribly flashy but still unique. I might just need to add flounces to ALL my future dress projects now that I know how easy they are to sew.

Dress Details:
  • Pattern: Simplicity 1877 by Leanne Marsh
  • Fabric: Catnap by Lizzy House
  • Thread: Gutermann in colour 792
I had such a great time making this dress and watching all of the other Catnap dresses pop up on IG (#catnapdresscontest and #catnapdress) and the contest Flickr page. This was exactly the type of selfish sewing I needed before getting back to sewing my gift list next week.

Linking up to Needle and Thread Thursday and Finish it up Friday.

Wednesday, 20 November 2013

From K - 16 Recent Finishes

Back in July I wrote a post where I mentioned an extremely over-ambitious goal that I set as a means of keeping myself focused and on track. My plan was to complete 15 Project in 15 Weeks between the dates of July 13th and October 25th. As my current WiPs are starting to pile up around me again and I'm feeling a tad bit overwhelmed, I figured it was high time that I reflect on what I accomplished during that time to help motivate me to keep on keepin' on. 

Until I actually sat down to write this post, I had no idea if I had met my target or not... and as it turns out I not only met my goal, but I evidently surpassed it by finishing 16 projects in 16 weeks. Wha?! *brushes off shoulder* All jokes aside though, I think it's good for us all to sit back sometimes and reflect on how far we've come and what we learned along the way - a task that I know many of us don't often do.
With that in mind, here are my 16 finishes:

Bags:
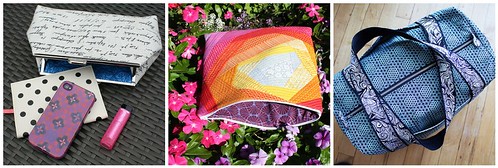
I adore making bags and was surprised to see that when looking back, I developed new skill sets with each bag I made. I learned how to glue on a metal frame, how to QAYG and how to sew with both strapping and duck canvas!
Mosaic of Bags
From Left to Right: Metal Frame Clutch, QAYG Pouch and Duffle Bag

Quilts:
In total I made four quilt: two baby quilts, a throw and a queen sized quilt (my biggest finish to date).
Mosaic of Quilts
Clockwise from Top Left:

Amanda and I also collaborated on a special lap quilt for our great aunt's 90th birthday during this time frame.
Wonky Star Quilt

Garments:
Over the past 16 months I also learned a ton about garment sewing. It was my first time sewing with both piping and voile.
Mosaic of Garmentss
Clockwise from Top Left:

Knits:
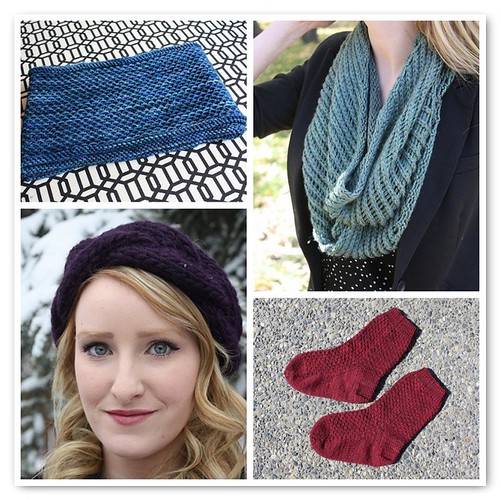
I have been knitting up a storm as of late, completing two cowls, a headband and a pair of socks. I might also have 4 more projects cast on already... but that's for another day.
Mosaic of Knits
Clockwise from Top Left:

Sometimes I find it considerably too easy to get caught up in my WiP list and gifting deadlines. Today I'm taking the time to celebrate my wins and look back at what I've learned in the process. I'm feeling pretty energized now to make some headway on my current WiPs: a manly Christmas quilt, a late baby quilt, a Christmas quilt and a beloved sentimental quilt that needs some finishing up.

Reflection was the perfect remedy for me today to get back at my machine. What do you do when you need to rev up your quilting mojo?

Sunday, 17 November 2013

From A - Sloppy Josephine Tee

My general clothing philosophy is comfortable, casual and fuss-free. This basically means that I live in knits. Knit tops, dresses, pants. You  name it, I probably own it in a knit. Since I would much rather shop for fabric than shop for clothes and needing an excuse to play with my new machines, I whipped up a new t-shirt this weekend.

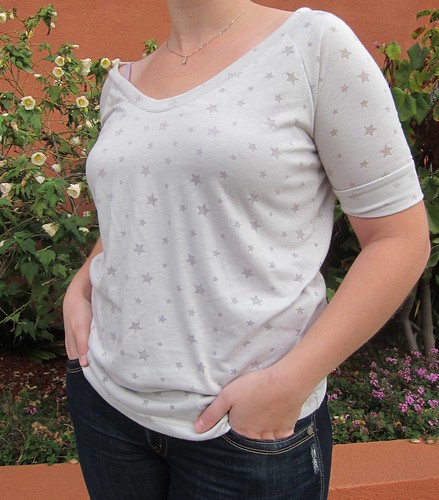
Sloppy Josephine Tee

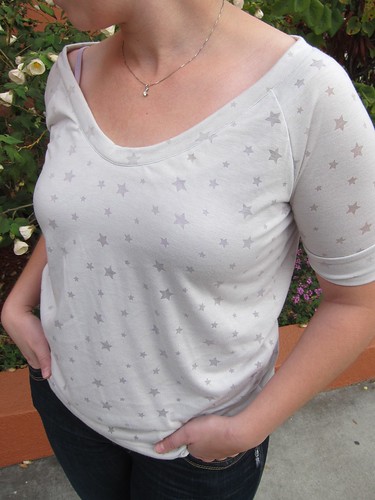
This is the Sloppy Josephine Tee by Papercut Patterns which I bought a few months back when my lust for knits and sergers blossomed into a full blown obsession.

I used some burnout jersey knit star fabric that I bought with Kelsey when we were in Seattle. It's a rayon/cotton blend jersey that is super duper soft and downright snuggly.

Sloppy Josephine Tee 

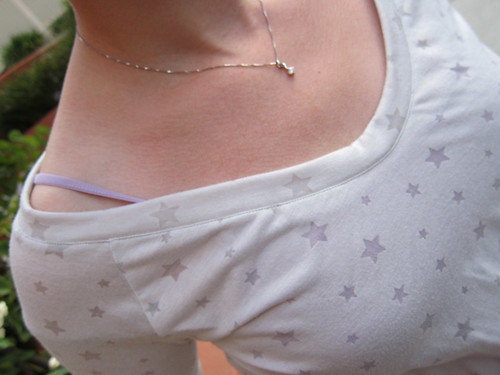
This top went from fabric to finished in only a few short hours. The pattern was pretty straightforward if a bit light on instructions. I didn't alter it at all except to add some top stitching to the neckline. I'll likely shorten the neckband a bit on the next one so that it holds everything in a little more but otherwise this is pretty much exactly what I was looking for.

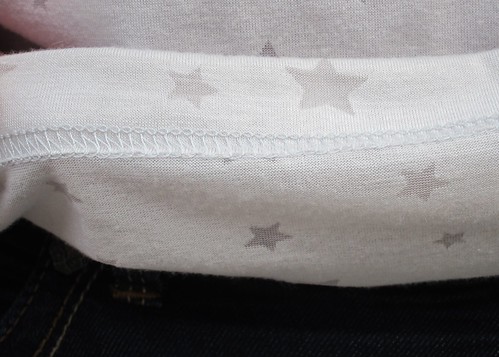
Sloppy Josephine Hem

And the new coverstitch machine? Genius. The hem was finished cleanly and professionally in about 15 minutes. It was so easy and painless that it might even have been my favourite part of the whole process.

Sloppy Josephine Tee

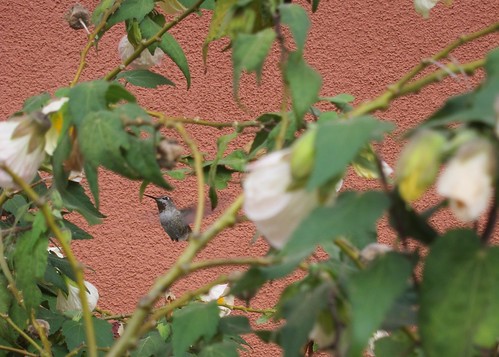
The finished result is extremely comfortable and dare I say, stylish. So cool in fact that even this little guy decided to fly in for a closer look (and probably some breakfast) while we were out taking photos.

Humming Bird

Happy weekend friends. What did you make?

Sunday, 29 September 2013

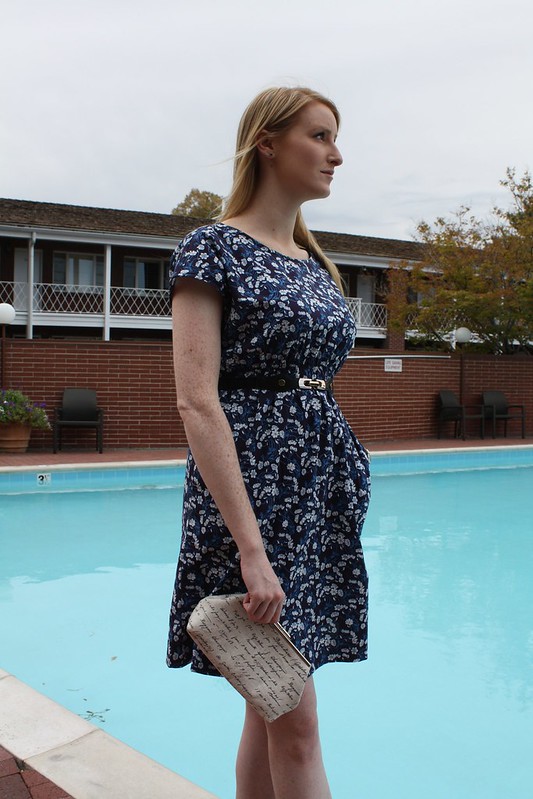
From K - Liberty Dress & Metal Frame Clutch

My goal for September's A Lovely Year Finishes of was to make a second Staple Dress. I have been crushing hard on April Rhodes' dress patterns and when I came across this Liberty print, I just knew it was meant to be.

Just before heading down to Sewing Summit, I polished off this dress and tossed it into my suitcase, ready-to-wear. My first take on this dress is in steady rotation and this second one is quickly becoming a wardrobe favourite.

I'm noticing a trend that each time I finish a Staple dress, I take photos of it while visiting the U.S... the first one was in Seattle, the second in Salt Lake City.... Maybe I'll have to plan a few more dresses so I have more reasons to visits my friends to the south.


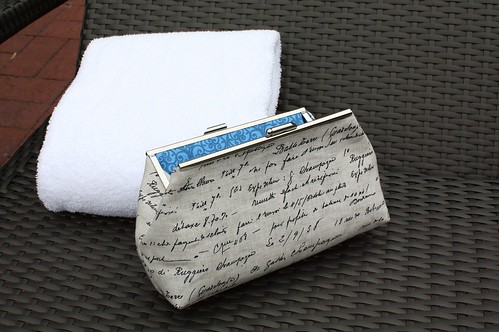
At sewing summit I took a class with the lovely Elena, where she showed us how to make a metal frame clutch using frames and directions from Upstyle. I was surprised by how quickly this little purse together and how working with glue and metal frames was far from intimidating.

I used a beautiful soft linen for the exterior and I love the subtlety of the French script. While I wanted the outside of the clutch to be all class, I knew I wanted something fun for the lining so I went for a bright blue scroll print from Joann's.


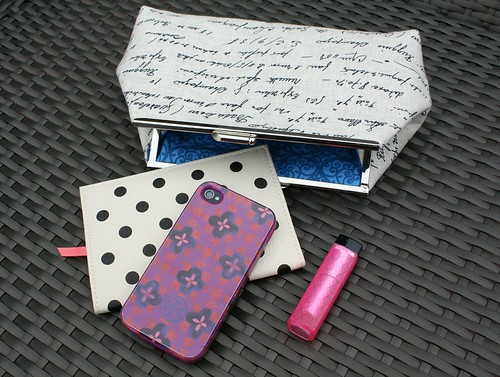
For a seemingly small clutch, it has plenty of space for a wallet, phone, passport, lipstick and car keys. I ordered five more frames upon my arrival home so you can be sure that there will be more of these in my future!
Linking up my September finish over to Fiber of All Sorts. Pop on over to see some of the other fabulous finishes!

Sunday, 15 September 2013

From K - Wiksten Tova

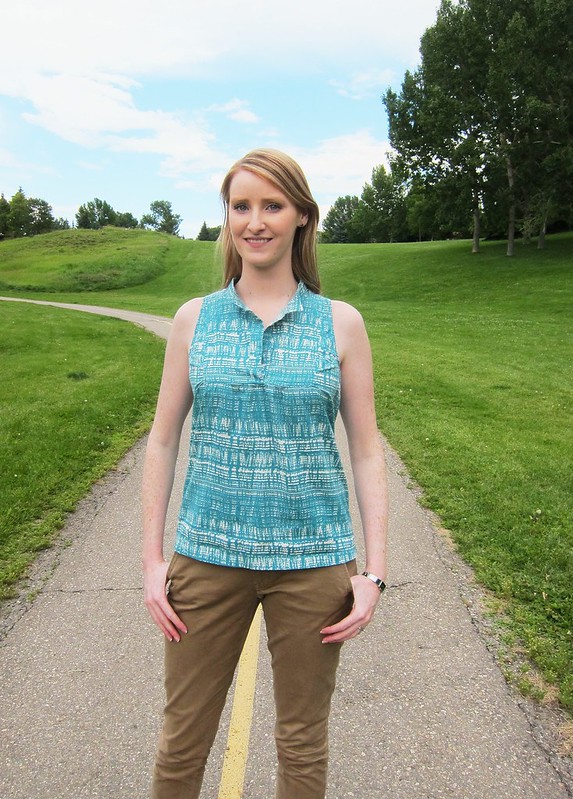
Over the weekend I was browsing through a past post about traveling handmade and I realized that I showed you a sneak peek of my Wiksten Tova, but then I didn't actual blog about it after. Today I'm going to rectify that slip by showing you the full garment, because honestly, I feel bad having led you on all this time (shame on me, tsk tsk).


I made this tank specifically for a spring break vacation in the sun, and it fit in my wardrobe like a dream. It pairs well with denim shorts, is comfortable over a bikini, and has just enough tailoring to wear out to supper without feeling like a beach bum.


I cut out a size medium to accommodate my chest but that resulted in me spending hours making alterations. In the end, I took off 2 inches along each side seam and another 3 in the back (7 total - eek!). I do feel like the bib fits me well as a medium, but reconstructing the sides, back and collar left me pretty exhausted. I'd like to try this pattern again, but next time I'll take my chances with the bib, and I'll cut out a smaller size.

In order to reduce extra fabric from the back, I made something of a French seam down the middle of the back, and topped it off with some pretty stitching (before I added the collar). It's a small detail but I really like the effect.

In total I probably spent 5x more effort on this project than an average sewist because of the sheer number and complexity of the alterations - did I mention I also added darts and hemmed the bottom twice? Yah that happened. Why I didn't simply recut my pieces I'll never know. I learned a ton on this project and for that I am grateful, but next time there is going to be a muslin. Lesson learned!

Tuesday, 10 September 2013

From A - Eucalypt Tank on the Fly

The two Wiksten tanks I made last Fall have been in near constant wardrobe rotation. They are great for layering and are generally cute and easy to wear. For the last few months I've been wanting to add a few more tanks to the rotation and not wanting to look like I had 12 of the same top in different fabrics, I have been on the hunt to find some other sewn tank options.

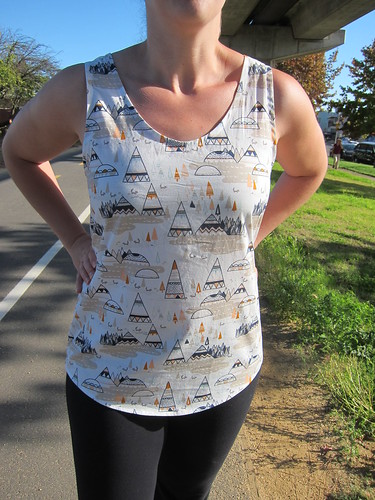
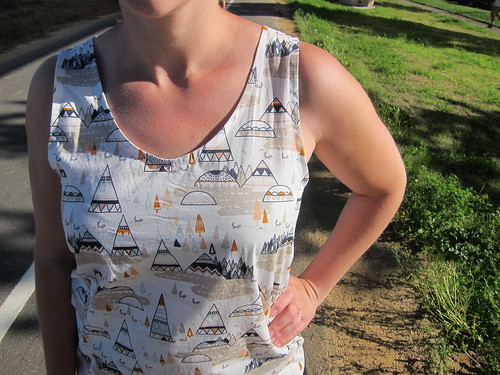
This weekend I used Megan Nielsen's Eucalypt pattern to whip up another option to my limited wardrobe using one of the prints from Sarah Watson's Indian Summer collection. Love this fabric and I have even cut out another project from my leftover scraps.

Eucalypt Tank

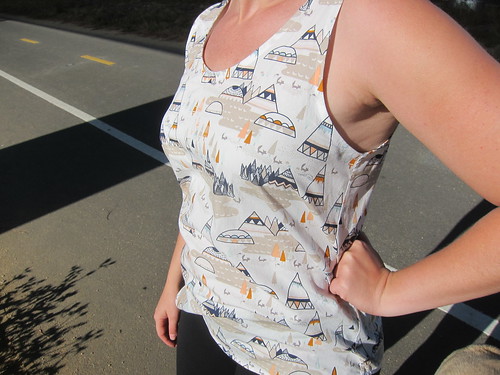
I cut a straight size medium and found it to be a pretty good fit. My only complaints would be that I find it a bit snug in the hips and that the armholes are pretty gapey on me (visible in the photo below). Although the hips seem like an easy fix, I'm not really sure what you would do about the armhole gaping...suggestions?

Eucalypt Tank

I love the neckline on the this. The almost v-neck scoop is very flattering and I like that it is scooped in the back as well. I am also a HUGE fan of the facing technique Megan has you use for the neckline and armscye. It looks very professional, more so than any other technique I have used.

A few people in the blog-o-verse have mentioned that the armscye on this top is cut too low (enough people that Megan even posted a tutorial on her blog on how to raise them). I didn't find this to be a problem for me and since I couldn't find very many clear shots of what all the fuss was about online, I'm going to leave you with a photo of my armpit so you can judge for yourself (don't look so shocked...it was bound to happen eventually).

Eucalypt Tank

Happy Tuesday!!

Thursday, 5 September 2013

From K - Dressing it Up!

In less than two weeks I'll be jetting down to Salt Lake City for my first even sewing/blogging conference. Although my to-sew list is beyond overwhelming right now, I decided that making a few new garments are an absolute necessity. I don't generally need an excuse to make new clothes, but it seems absolutely fitting to wear handmade in a venue full of people who will not only notice but will also really care!


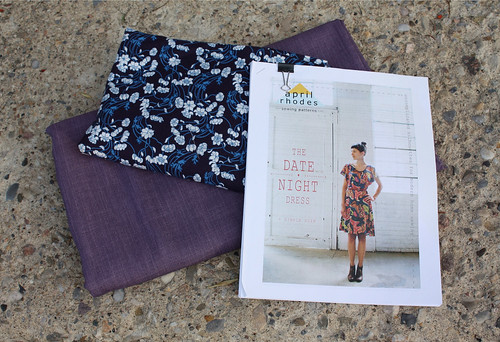
Last week I picked up a Liberty of London Lifestyles print that I've swooned over for months (10% at my local quilt shop) and have decided to make it into another Staple Dress (see my first Staple here). Then just yesterday I scored some amazing chambray-esque purple fabric from Fabricland for $7.50/m! Beyond amazing deal right?! The drape of this fabric is so soft and beautiful, I can't wait to try out another of April Rhodes designs, the Date Night Dress.

If these dresses turn out half as stunning as I anticipate, I may have to stock up on more fabric (that Fabricland score comes in about 15 different colours, all on sale - Canadian friends, hit up your local FL before I clear out all of the inventory!). I'm beyond obsessive right now with April's designs. I'm positive these will be the perfect last minute suitcase additions and I can't wait to wear them around.

To keep myself on track, I'm linking up to the September: A Lovely Year of Finishes over at Fiber of All Sorts. Come join in on the fun, the goal setting link is open until midnight on September 7 so there is plenty of time to participate.

Tuesday, 3 September 2013

From A - Making Special

While on the road, the Mr. and I celebrated our cotton (second) anniversary.

Anniversary

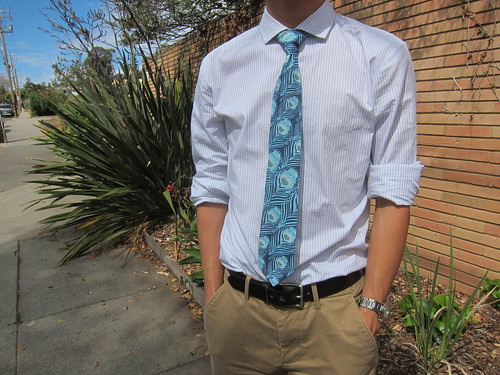
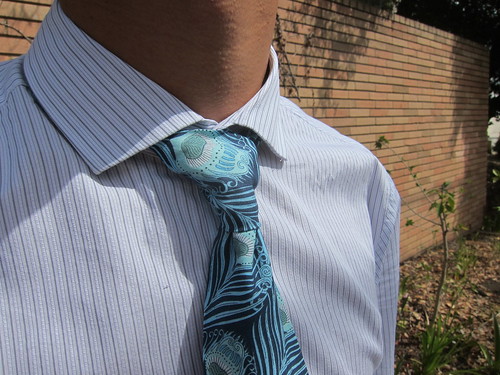
Since you only get one cotton anniversary in a marriage, I couldn't pass up the opportunity to make him something special. After mulling it over for a couple of months, I had settled on an embroidery project. I bought the necessary supplies and proceeded to ignore the coming event.

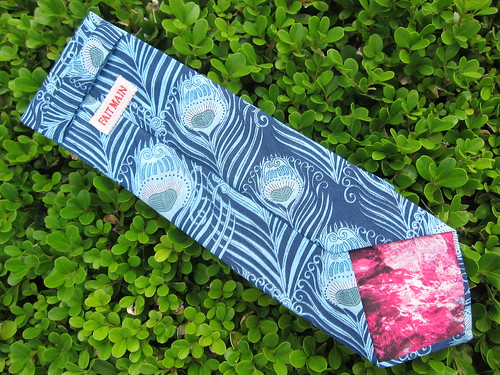
Liberty Tie

For once my tendency to ignore deadlines paid off because this post from the Colette Patterns blog popped up on my feed reader and promptly kicked my sweet little embroidery project's metaphorical butt right out of the picture.

Liberty Tie

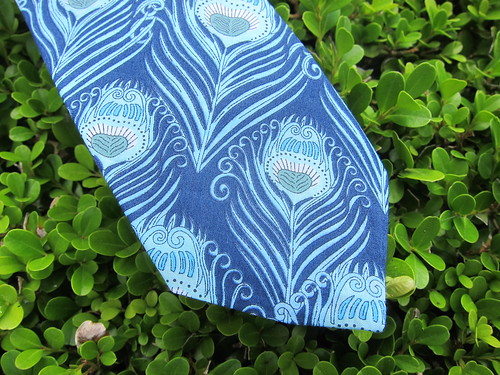
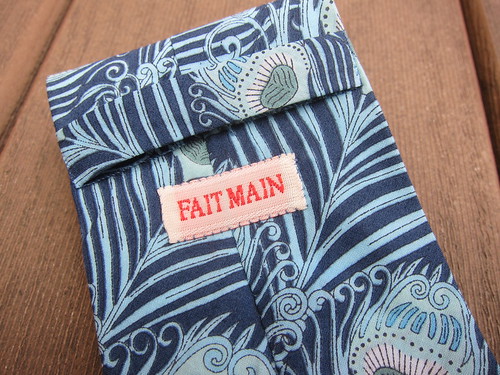
Within about 30 minutes of reading the post, I had the whole thing planned out in my mind. I would hunt down some Caesar tana lawn from Liberty of London for the exterior, line it with scraps from my Liberty Wiksten tank, and add a little "handmade" sewing label I picked up when we were in London together shortly after getting married.

Perfect Point

And the result: the kind of perfect imperfection that defines our marriage.

Tie Lining 

There were some challenges getting everything to line up well enough to make a tie point that would be acceptable for public wear. Fortunately, it was nothing that a bit of strong arming and a bunch of steam couldn't fix.

Label and Keep Detail

The hand sewn finishing touches on this one are really what made it special: slip stitching the center back seam, attaching the label and tie keep. The perfect way to inject it with a little bit of l-o-v-e.

Saturday, 31 August 2013

From K - Panda PJ Pants

Today I want to share a little secret with you... you see, I have a bad habit, and I hope I'm not alone in this (if I am, you have my permission to skip this post but I have a feeling you might be just as guilty too).

I don't know about you, but I often get really excited to start a new project - I rush out to buy the supplies, high tail it home, get started cut cut cutting away... but then when the going gets tough, I ever so calmly (or in this case not so calmly) 'supermarket sweep' the whole lot into the nearest drawer and call it a day. *insert brushing off hands here*


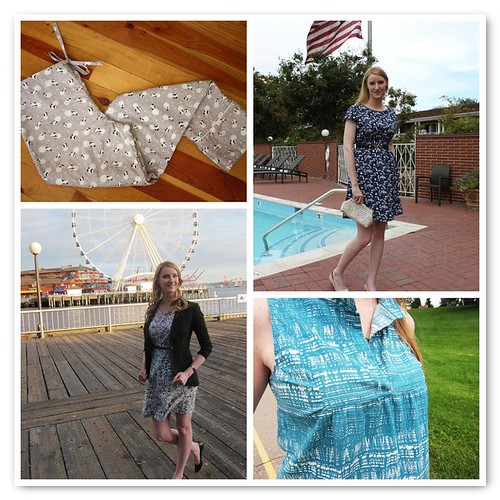
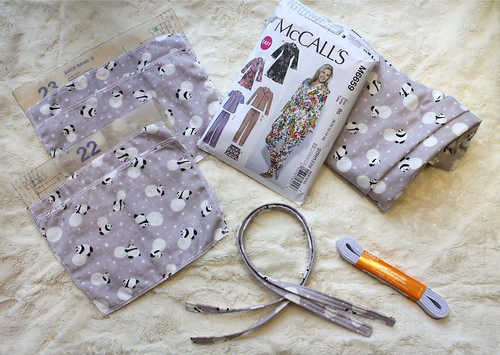
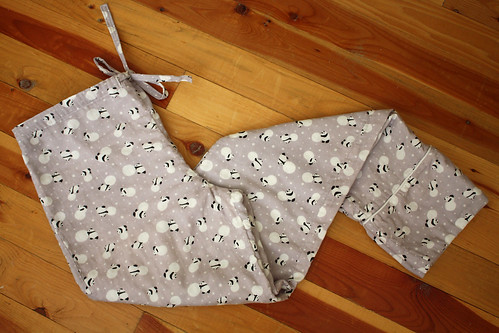
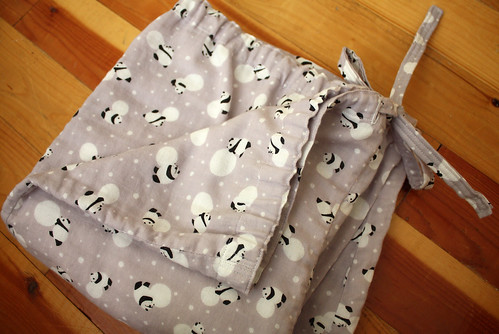
Earlier this month for my August: A Lovely Year of Finishes post, I mentioned a project that followed that description to a T. I bought the most lovely and adorable double gauze by Cosmo textile, complete with sunglass-wearing pandas pushing snow balls. I mean come on, this fabric was just begging to become PJ pants.


I have never worked with piping before so when I hit that little snag in my project I gave up. Well temporarily at least.


Ever begrudgingly thankful for public goal setting and self-imposed deadlines, I hauled this project out to the cabin with me this weekend to polish 'er off so to speak.


And I did just that, I piped these pants, altered the waistline by adding some elastic in the back, tailored, hemmed, and called it a day *pats self on the back*


My piping is far from perfect, but I think next time it will be better. Part of the problem I had with the piping was that this pattern just wasn't meant for double gauze. While it's luxuriously soft, the bottom ankle panel, which includes an internal facing, is pretty dang thick (we're talking 4 layers!). Four layers, piping and a newbie piper just don't quite work wonderfully. On the plus side though my ankles will be nice and snugly warm this winter.

Have you struggled with a similar project in the past? Please tell me I'm not alone!