Saturday 27 July 2013

From A - Clearing Out the Cobwebs

One of the best things about moving is how it forces you to get stuff done. As I was packing for the road trip, I found more than a few projects that had been stuffed into bins and boxes and long forgotten.

Grey T-Shirt

Way back in November 2011, I took a T-Shirt making class to build on my virtually non-existent serging skills. I managed to finish everything except the hems during class (partly because I hate pressing hems and partly because the cover stitch machine was on the fritz) and then my nearly finished T-Shirt sat on my To Do list for the better part of two years.

Since I don't have a serger or a cover stitch machine. This was a must-do before leaving the city.

Seam Detail 

It took me a couple of tries to figure out the cover stitch machine but even with my incompetence it only took about an hour to finish this up.

Being Worn 

Love bamboo jersey I used for this. It is cool to the touch and silky smooth. A perfect basic for my summer wardrobe.

Thursday 25 July 2013

From K - Finished Duffle Bag

A couple weeks back I shared a new bag that I had started and today I'm sharing that finished duffle with you (yay for a finish!). This bag has already been tried and even tested. Over the past 7 days I have been on 5 airplanes and a helicopter, and while all the traveling is exhausting, seeing this lovely handmade goodness at my side never ceases to make me smile.

I followed the carry-on size duffle bag pattern by StudioCherie however I did make a few minor adjustments. Inspired by Heather's bag, I added a zipper lining to give the inside appearance of the bag a more polished look as well as altered the zipper tabs to be shorter and square (rather than rounded).

I also decided to add a pocket on the one empty side of the bag (the front).


I used 80/20 cotton/poly batting for the bag body, and duck cloth in all four side pockets. In these photos my bag is already packed, but trust me when I say that this bag holds its shape pretty well even if it's not full. This bag holds a heck of a lot of stuff, and when it's jammed full like this one, it is heavy! I'm glad I decided to keep the trolley sleeve on the back of the bag, it definitely helps at the airport.

Making this bag was only the second time I had ever used a serger but gosh am I ever hooked! I don't think I would have liked the bag making process quite as much had I needed to zigzag all of my edges (but maybe that's just my sour disposition to the tedious/slower zigzag process).

Quick tips:
  • Use Clover Wonder Clips to hold the pieces together when you start assembling the bag.
  • Use a denim needle when piecing the bag as well as for sewing the nylon strapping.
  • Cherie suggests diamond quilting but I choose more of a plaid. More stitches give more structure (but also take more time so account for that).

When I originally went to purchase 2" nylon strapping from my local Fabricland, they only had white in stock (which had me seriously questioning what I wanted to try next). In the end I totally lucked out, finding the black strapping at a Fabricland across town. While many lovely bloggers left suggestions for alternative options, I was really happy to know my original envisioned strap would come true.
Since I have 10 feet of 2" white strapping now, I may just have to make myself another duffle soon!This project marks my first completed project in my goal to finish 15 in 15 weeks, and it has got me all fired up to keep on finishing!
This project was my July goal for A Lovely Year of Finishes. I am also linking up to Needle and Thread Thursday over at My Quilt Infatuation and at Finish it up Friday over at Crazy Mom Quilts.

Friday 19 July 2013

From A & K - Hopping Along

For the past couple of weeks we have been busy hopping around the quilty blog universe as part of an inspiring blog hop. Today is our stop.

Everyday Fray, a play on words representing both a take on our busy lives and our love of daily craft sessions. Basically the frayed edges of the everyday. To make life simple, our post titles tell you who they're from. A & K, is short for Amanda and Kelsey. The short version is that we're cousins, we live in different parts of the country and we love to sew. You can read the long version here.

We both do our finest work on a Janome 4100 QDC. Amanda bought hers after falling hard for some Heather Ross Goldfish fabric on or about a rather notable birthday. Kelsey followed suit after realizing that buying the same machine meant free round-the-clock tech support.

As the primary component of our carry-on baggage allowance while traveling, both of our machines have racked up more frequent flyer miles than your average Singer. If you haven't been there before, you might want to consider that dragging a sewing machine through airport security usually leads to interesting off-script conversations with security personnel. After realizing that it was actually a real live sewing machine going through the x-ray scanner, a particularly diligent security officer recently asked Kelsey if she actually sewed...which naturally begs the question of why else would one be schlepping a 20lb sewing machine around an airport (perhaps the newest fad fitness regime?!?).

What you'll see here if you stick around is that Amanda has a special talent for starting new projects while Kelsey is more likely to actually finish them. Perhaps the most amusing part of this dynamic is the fact that Amanda's WiPs also seem to be on Kelsey's "To Finish" list. More than once, Amanda has had to fend off Kelsey's attempts to adopt a few of her long forgotten WiPs.

Kelsey's propensity for order extends beyond her fixation on WiPs. She is a master list maker and has the annoyingly well organized craft room. For your sake, Amanda's craft space sprawl has never been featured on the blog. Sprawl really is the right word for it.

When we aren't busy quilting, knitting or stitching at home, we do our best to fit in some travel where we can (small craft projects in hand of course). We try to share some snippets of trips here on the blog (found here).

These days you can also find us on Instagram and Flickr.

If you have a few minutes, don't forget to visit the other blogs on this week's hop.

Karen @ Little Birdie Quilting Studio

Kathy @ Kwilty Pleasures

Katie @ Snuggle Up With A Dish From Karma

Alison @ Making Happyness

Ella and Nesta @ Ella & Nesta's Little Room

Adrienne @ Chezzetcook Modern Quilts

Nicole @ Modern Handcraft

Aylin @ AyliN-Nilya

Thursday 18 July 2013

From A - One for the Road

I have made a few references to the fact that I'm leaving fair Toronto and moving to the San Francisco Bay area to take advantage of an opportunity that as a family, we couldn't pass up. When this opportunity came along, I wasn't ready to move. Not even close. Early on, I decided that the move would happen gradually over almost two years. This seemed like the only way to make it manageable.

I've been quiet on the blog lately while trying to see as many people as possible and finish off everything at work and at home before leaving. In short, it's been hard. My stress levels are high and I've had almost no time for the things in life that make me happy and give me balance.

After being in the office every single day for a week after my "official" end date, I decided that the only way to avoid spending my very last week in Toronto working 12 hours a day was to sign up for the world's most awesome  four day quilting class with Lizzy House. Yep, you read that right, Lizzy freakin' House. Easy choice.

I'm not sure that I can put into words what it meant to me to spend four days with Lizzy and the wonderful group of women in my class at this stage of the game. Suffice to say that it was amazing enough that I actually cried on the last day...on and off for almost an hour (could also be related to the whole moving/saying goodbye thing).

Class Photo
Class photo!!
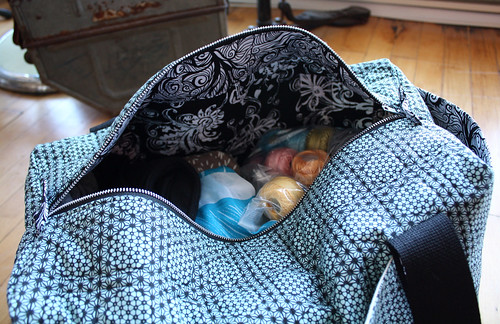
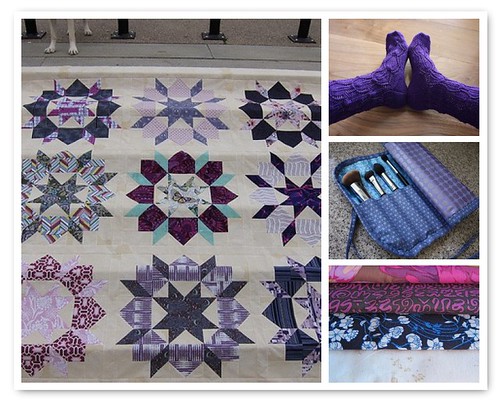
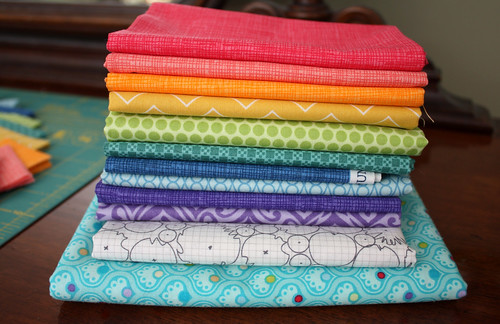
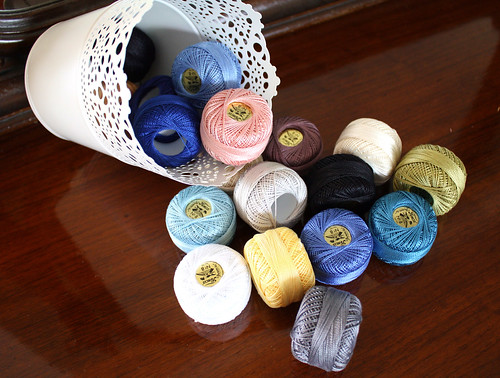
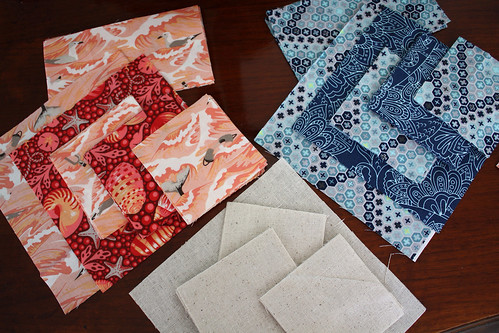
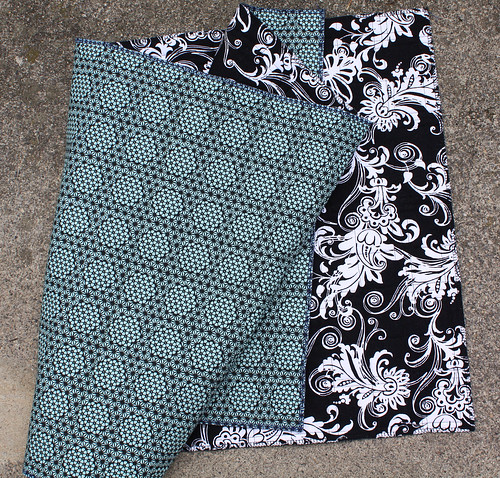
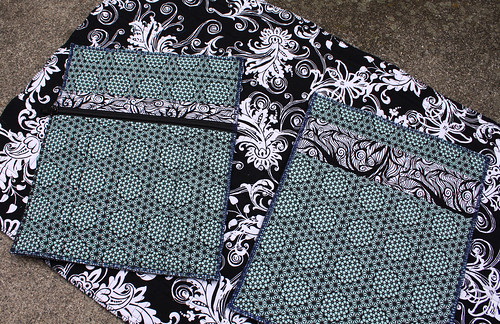
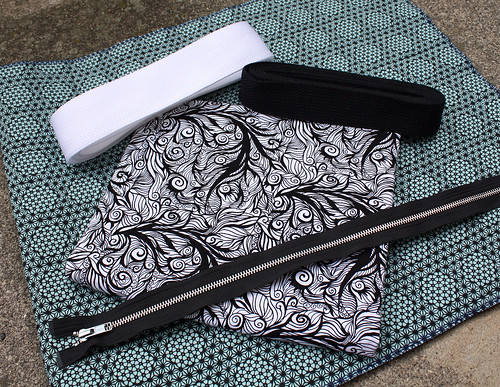
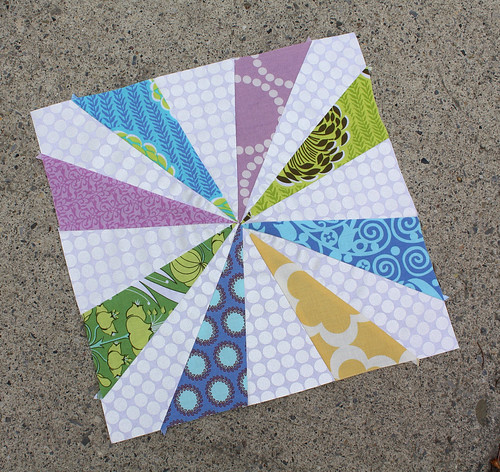
Things kicked off with Lizzy's help picking and organizing our fabrics. The next three days were all about getting down to business pressing, cutting and sewing our blocks together. It took me all four days to make it about 1/3 of the way through the cutting and to get one block pieced.
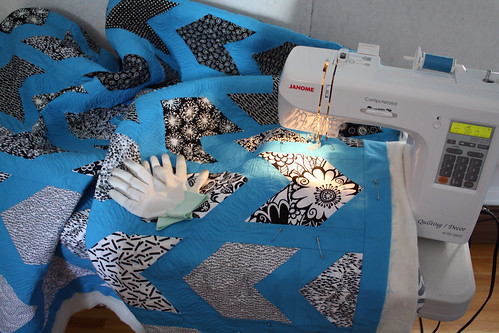
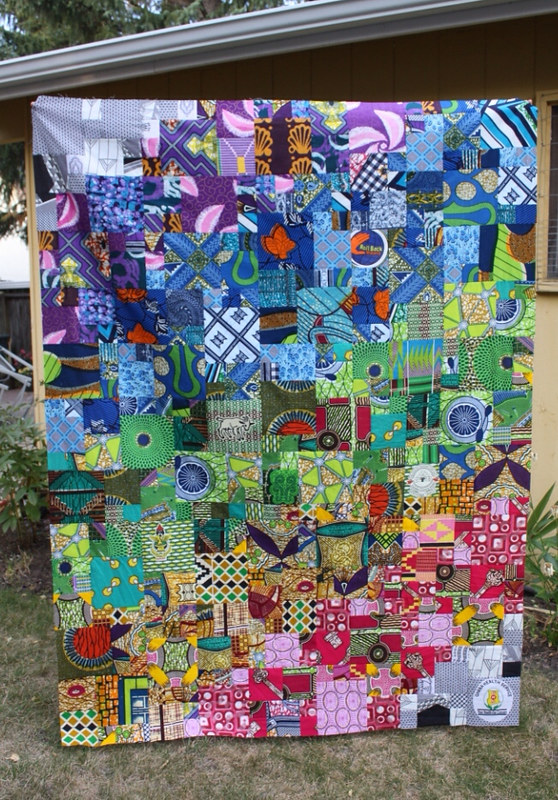
Goodbye Toronto Block
First block.
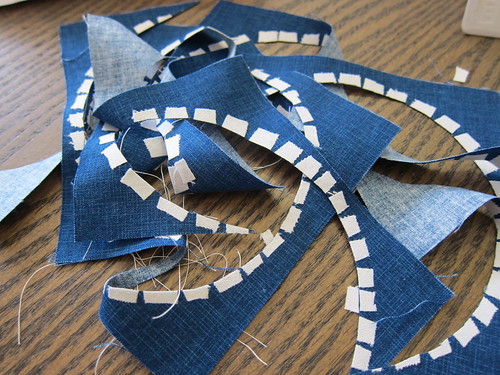
Amazing, right? I really love how this is coming along. Every part of this quilt is beautiful...even the scraps it generates.

Trash Scraps

Let's just say that this puppy is going to be a lot of work. The kind of work that bends your brain, makes you hesitate and double check everything before you cut into your fabric and that makes it tough to see the beautiful quilt at the end of the tunnel. Not so different from our move, except at the end of the move there is an exciting new life waiting for us in place of a lovely quilt.

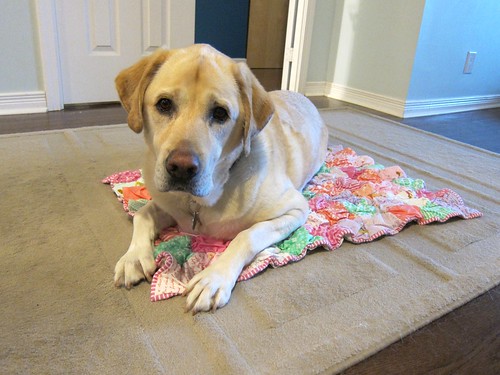
In light of this parallel, it seems appropriate to tackle this quilt on the four week Farewell Canada tour we hatched (no better way to elevate a busy move to truly crazy status). Me, the Mr. and our dog are driving across Canada and down the West Coast until we make it to California. Along the way, we are stopping to spend time with almost everyone that we love and even found a little time for some much needed R&R.

I'm hoping to grow this quilt throughout our journey, making a block a day so that when I arrive in the Bay area, I'll have a gorgeous quilt top to remind me that difficult things can also be beautiful.

Tuesday 16 July 2013

From K - Pattern Tester

Last weekend I whipped up a quick baby quilt top for a friend using a new pattern by Elizabeth Dackson of Don't Call Me Betsy. I can't share a ton with you yet as she hasn't released the pattern (coming out mid-August) but what I can tell you was that this quilt was a ton of fun to work on!


When I received the pattern, I knew immediately what I wanted to do with it, and who to make this quilt for. I pulled fabric from my stash for this quilt in less than 5 minutes (definitely a record for me!). Most of these prints came from my Stash Stack Club subscription and a few are from my LQSs.


While I wait ever so impatiently to show you my finished top, I will keep stitching away. So far it's machine quilted and half bound. Next up is some yummy hand quilting work to really wrap it up.


It's a good thing I recently ordered 18 mini balls of Presencia perle cotton (size 8) from Mad About Patchwork. They arrived just in time for this project to come on a road trip with me this weekend. Let the vacation stitchery begin!

Saturday 13 July 2013

From K - 15 in 15 weeks (Q3 FAL Goals)

For a girl who is crazy for finishes, and normally feels overwhelmed to have more than 3 quilts on the go at once, I've landed myself in deep water. Right now my project list is a meter long and includes 8 quilts and almost a dozen miscellaneous sewing projects on it.

she can quilt

My ultimate goal is 15 projects in the next 15 weeks (of which nearly half of which aren't started yet). To keep me driven and on track, I've committed to finishing some WiPs/UFOs as part of the Q3 2013 Finish-A-Long over at She Can Sew. Because my '15 in 15' goal hovers horrifying close to crossing an insanity line, I'm just going to link a few high priority projects here.
 
1. Sew Positive Baby Quilt

I am fortunate to have the opportunity to pattern test a new design for Elizabeth Dackson from Don't Call Me Betsy. The pattern is a stunner and could not be more perfect for a dear friend who's sporting a new baby bump. I've never pulled a faster palette from my stash. Don't you love when that happens? All of my pieces are cut and I'm half way done the top (pictures to follow next week).
2. Salt Water Swoon Quilt

 
Tula Pink's Salt Water collection and butter soft natural linen are going to make for a snuggle worthy stunner. Have you heard about the 2013 Swoon along party organized by Sarah over at FairyFace Designs? I signed up and am SO excited to get started on this one. Nearly a third of this quilt top is cut, and piecing is going to begin right after this post!
 
3. Black & White Kites Quilt


I really have no reason for this baby quilt not to be complete. I'm determined to knock it off my WiP list.

4. Magic Wax Print Quilt


This quilt top was pieced together almost a year ago. I ordered backing material from the Netherlands (where many of the African textiles are printed) so this one's just waiting for a finish.

Amanda is in the midst of an international move (which includes a month long 'Farewell Canada' driving tour along the way to visit family and friends). Being the ambitious lady she is, she plans to knock out a couple of UFO/WiPs of her own.

5. White Star Quilt

White Star Quilt Top

This quilt top is finished and waiting to be quilted and then snuggled. It's on the list for a finish this quarter.

6. Posy Quilt (2.0)


After this unfortunate event happened to the original Posy Quilt, Amanda purchased more fabric and has already started making it all over again. She'll definitely be purchasing different batting for this new version. 

We've been feeling very inspired by all the link ups that are going around the quilty blogisphere for Q3. If you haven't linked up yet, there is still time. Check out the rules here and come join the party before monday night when the link closes. Hope to see you there!

Friday 12 July 2013

From K - Wonderful Washi Dress Finish

More than half a year ago Amanda came to visit me in Calgary, and even before her plane landed I had already plotted out a giant 'sewing hit list' because lets be honest, makings lists is totally my style. Item número uno on said list? A Washi dress!


I fell hard for Rae's Washi Dress pattern the first time I spotted it, and wanted desperately to give it a try. My problem was definitely fear though, because the last time I tailored a clothing item was more than a decade ago. While this pattern isn't tremendously tailored, the fitted bodice provided a few challenges for me.


While I may be blessed with a very long torso (I'm 5' 11.5") and a narrow rib cage, my stature often makes tweaking bodice pattern pieces a neccessity. Long story short, the bodice of this dress required a total overhaul to fit me, but thankfully that is where Amanda stepped in *cue the trumpets!*

With quite a bit more experience and a whole lot less fear than myself, Amanda took the necessary steps to adjust the pattern to size. That cousin of mine has got some mad skill!

While she was here I completed the dress entirely, minus about an hour of finishing work. Why it took me nearly 8 months to complete those last few tasks is baffling. A few weeks ago I pulled out this UFO, polished it off, and suddenly I had a new outfit for Stampede!

I am absolutely in love with this finish and so thankful that Amanda was there to help me along the way. Over all I really enjoyed the process and I think Rae did a great job writing the pattern. The neckline has a very polished finish and I can definitely see myself making a few more of these. I just hope I don't drag out the finish again for no apparent reason!

This crosses off 1 of 15 projects that I want to finish in the next 15 weeks (see I told you that I like lists!). Wish me luck... or at least a little sanity, ha! I'm linking this finish up to Finish it up Friday over at Crazy Mom Quilts.

Monday 8 July 2013

From A & K - We Have a Winner!!

It warmed the cockles of our hearts to read all of the sweet and thoughful comments you left for us on our giveaway post. Just a reminder, up for grabs we have this lovely assortment of our most favourite quilting goodies:
    • A Kwik Klip for pin basting
    • Magic Bobbin Winders to help perfect your quilting stitches
    • A Supreme Slider to make your free motion quilting a little easier
    • Clover Quick Clips (Amanda is totally obsessed)
    • Liberty!!! in book form
    • Three Charm packs for 2wenty Thr3e
    • A digital copy of Rachel's Smitten pattern
    • Season 1 of Downton Abbey
So without further ado, the winner of our blogiversary giveaway is:


Congratulations Snips! We hope you enjoy this collection of our favorite things as much as we do.

Sunday 7 July 2013

From K - Duffle Bag

For months now I have debated making a getaway sized travel bag. I went back and forth agonizing over what pattern to try my hand at first. While I adore the finishes on the Weekender (I swoon endlessly over Amy's piping, I mean come on, no one can resist that!), but gosh am I ever intimidated after reading blog reviews. I also considered the Aeroplane Bag by Sew Sweetness, a large sized bag that promises to be oh so less frustrating. Both bags are stunners, and both are bags I'd like to try my hand at someday, but both bags didn't seem quite right for my first try at a travel bag.
 
 
Then a couple weeks ago while reading Heather's post about her completed Carry-on Sized Duffle Bag by StudioCherie, I knew I had found the perfect large bag pattern.
 
 
After more than a few generous pointers from Heather, I bit the bullet and started cutting. I've chosen three fabrics for my bag: Starcomb from Parson Gray's Curious Nature collection as my feature fabric, a print from Studio E Fabrics' Essential collection as my lining, and Ink by Melissa Marie Collins as my accent fabric.
 
 
Over the past week I managed to cut, quilt and sew the duffle body, end pockets, trolley sleeve and a bonus pocket. Next up is installing the main zipper and zipper facing, making the straps and of course the not-so-tiny task and sewing all these pieces together.
 
 
The pattern calls for 2" wide nylon strapping (of which all I could find in town was bright white). Alternatively I did find some 1.5" black cotton strapping that I think might suit the fabric better, but I'm uncertain about its narrow width. Any recommendations or thoughts?
 
I'm thinking up to this months' edition of A Lovely Year of Finishes over at Fiber of All Sorts. I have a couple of weekend trips coming up and this links party is the perfect motivation for me to get this wrapped up in time.

Saturday 6 July 2013

From A - Matching Set

A quick evening of sewing and with the help of Rae's detailed Peekaboo Bonnet pattern and I had this adorable little cap.

Finished Bonnet

Scrumptious!! I love the lack of raw edges and the fact that it is reversible, which doubles its utility. Rae's pattern was well written and easy to follow. I did find some of the seams a little awkward due to the bonnet's small size and round shape but i suspect that that was more of an Amanda vs. 3D sewing issue than a real issue. Having made one of these, I am confident that the next one will be even easier.

As with the matching dress, I used fabric, binding and cording that I purchased at Fabricland.

Finished Bonnet

The only change I will make to the next one will be to interface the patterned band before attaching it. I found that with the way my bonnet came together it tends to collapse/wrinkle.

Matching Bonnet and Dress

Now my friend's sweet little baby will have a new outfit to add to her summer wardrobe!

Thanks to all who entered our giveaway. Our winner will be announced in the next couple of days.

Linking up to Finish Up Friday over at Crazy Mom Quilts.

Wednesday 3 July 2013

From K - Kaleidoscope Centers

This past weekend I finished up the last of the 60 half blocks that I require for my kaleidoscope quilt top. Since it was pretty overcast and my sewing room was far, I dragged one of my design walls outside so you could have a peek in some natural light. Here are 30 of my half blocks, all lined up and waiting to be sewn together.


I was so excited when I finished up my last half block... that was until I started sewing the pairs together and the first one turned out something like this:


Not exactly the pristine center seams that I had been hoping for. I tried out a few different pining methods and was able to pull off something a bit more presentable, but to be honest, I really struggled with this.


I went to bed angry the other night and could NOT fall asleep. Have you struggled with center seams? Any great tips that I can try my hand at? I'm worried this WiP has me semi defeated and as a result it may hang on my design wall long after what I anticipated.

To end on a much more positive note, I started making a new bag yesterday and I could not possibly be more excited about! I'll be sharing more details about it in my next post. And more importantly, you still have three days to enter our blogiversary giveaway to win a collection of some of our most favourite sewing treasures. Enter now and we'll post the winner this weekend *insert happy dance here*.

This week I am linking up to WiP Wednesday over at Freshly Pieced.